BBB Accredited Business

© 2024 Embroidery Central

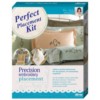
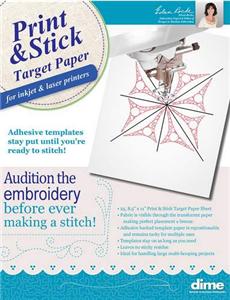
Print & Stick Target Paper
Brand Logo for Designs in Machine Embroidery

Print & Stick Target Paper

SKU: PSTP01

UPC: 810065021427
$24.99

Shipped Item

Will likely ship by Tuesday


Additional Images:

Larger View Larger View

Print & Stick Target Paper

Audition the embroidery before ever making a stitch!


Periodically, there's a product that is as great as the invention of sliced bread. Sure, anyone can slice their own loaf of bread, but it sure is more convenient when the bread is already sliced for you!

That's how we feel about the new Print & Stick Target Paper! Translucent and sticky makes working with these templates less tricky!

As an embroiderer, you're accustomed to working with traditional paper templates. You print a template of your embroidery design on plain copy paper. Sure, it will help as you position and plan your embroidery layout. But the paper can slide—the scotch tape you use to attach the template to your project wears out and the template is a little awkward to work with. Or you may be more advanced and use tracing paper for your templates. But it's a little tricky to run tracing paper through a printer or copy machine. It's also very delicate to work with and it's not adhesive backed!

But when you use the new Print & Stick Target Paper you'll immediately see the difference!

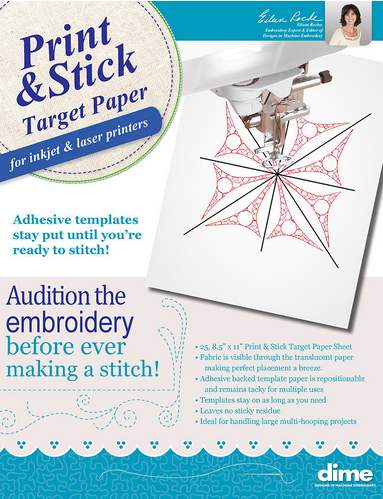
It's translucent! This means you can see your fabric through the template. What a difference this can make when you're trying to align your embroidery design layout!

It's adhesive! Having the ability to adhere the entire template on your project helps ensure accuracy! I've used scotch tape in the past, but one way or another, the template shifts and my carefully planned embroidery layout is ruined! Print & Stick Target Paper is adhesive backed and lasts for multiple uses!

Adhesive templates stay put until you're ready to stitch!
Then when you've aligned your needle with the target, remove the paper and begin stitching!

Product Details:

  • 25 sheets of 8.5" x 11" Print & Stick Target Paper per package
  • Fabric is visible through the translucent paper making perfect placement a breeze
  • Adhesive backed template paper is repositionable and remains tacky for multiple uses
  • Templates stay on until you remove them
  • Leaves no sticky residue
  • Ideal for large multi-hooping projects

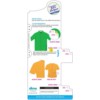
Print and Stick in five easy steps:

  1. Place paper into printer.
  2. Print onto paper.
  3. Remove printed paper from printer.
  4. Peel and stick where you want it.
  5. Remove before you stitch.


Dorothy V.

Bought this product from another seller; this is a great tool! I have enjoyed using these sheets. Of course, as stated above, I had to figure out how to use it but did and love it!

Please Login to comment on this post.

Kirsten S.

Thanks for your review, Dorothy!

Please Login to comment on this post.


Vel H.

do you ship to Australia?

Please Login to comment on this post.

Kirsten S.

Vel, thank you for the question. Yes, we do ship to Australia. When you check out, you can select your preferred International shipping option/carrier.

Please Login to comment on this post.


jeanne r.

I wish you had included directions with the package of Print and Stick. Your directions on the website are very UNCLEAR.

Please Login to comment on this post.

Kirsten S.

Here's a link to the video where Eileen actually shows how to use it: https://www.embroidery.com/event.ec?eventID=2159&e...

Please Login to comment on this post.

Kirsten S.

Hi Jeanne,

I'm sorry to hear that. I think you are not alone. When we had our live event including a demonstration of the print and stick Target paper, there were several who commented that they have been wondering how to use it.

If you feel up to it, perhaps you could share specific instructions that were unclear at this address, so that they can work on improving the packaging with your input: https://www.shop.dzgns.com/pages/contact-us

Please Login to comment on this post.


Thomas J.

One side of the Print & Stick Target Paper is smooth the other side is rough. What side of the do you print on?

Please Login to comment on this post.

Heather B.

Thanks for the question. Thomas. You will want to print on the rough side, not the smooth side.

~Heather
[email protected]

Please Login to comment on this post.


Anne K.

How do you get an image to print from the embroidery design files?

Anne

Please Login to comment on this post.

Heather B.

Hi, Anne. Thanks for the question. That depends on your software. In most embroidery software, you can choose "File" > "Print". If that doesn't work in your software, please refer to your manual.

~Heather
[email protected]

Please Login to comment on this post.


Roxanne C.

Do you need the embroidery hoop? I have an Elesimo Brother Machine.

Roxanne

Please Login to comment on this post.

Heather B.

Hi, Roxanne. Thanks for writing. This Print & Stick Target Paper is used in conjunction with your embroidery hoop. You print your template onto the paper, peel of the backing, and then stick it onto your hooped item, which will allow you to easily place your design. I hope this helps. Please let us know if you need clarification.

~Heather
[email protected]

Please Login to comment on this post.


Please Login to comment on this post.