My most recent project was to embroider names on Christmas stockings for my nieces and nephews. I had given away the old and somewhat cumbersome countertop hoop holding apparatus that I have used in the past. Realistically speaking, I didn’t even use that tool with much regularity. It was cumbersome! I often decided to skip that step and find another way. My new hoop mat with its gripping surface -- it had been ordered, but hadn’t arrived yet.
So, like I often did when I didn’t want to deal with my hoop holder, I found another way. An embroiderer always does. In this case, the names I was planning to stitch were going to be too large for hooping the stockings as they were. I decided to open the seam of the cuff. I used my kitchen bar for hooping, and used my Sticky hoop to float the stocking cuffs. I used printed templates and basting boxes to make sure the names and cuffs were aligned .
Many of us invent on the fly like that. It’s a bit rarer to not only invent something for a single job, but to work on it, tweak it, and take the time, effort and production that goes into making a new tool that is versatile and meets the same need that your original temporary invention met.
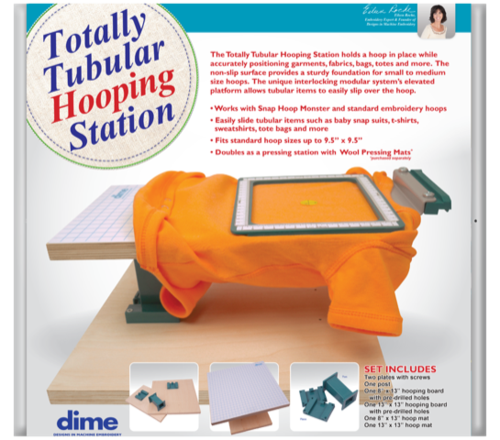 Eileen Roche has done that with the Totally Tubular Hooping station. The invention began when she was stitching bags with Nancy Zieman. When it came to hooping bags for embroidery, Eileen had the creative idea of using an ironing board for hooping the tubular bags. That worked. But you can imagine the pitfalls. Ironing boards aren’t made to hold your hoop still -- it will slide all over the place, and be tough to keep straight. They also can’t take a lot of pressure, such as the pressure that is often needed to hoop a thicker tote bag in a regular tubular hoop.
So she thought about this need: hooping tubular items. This isn’t just for tote bags, but what about jeans, onesies, and such? After months of work with a team, prototypes, drawings, measurements, tests, and trials, the new versatile tool was born. This is the new versatile tool that meets the same need as the temporary ironing board invention. It meets it beautifully, and with greater efficacy. The Totally Tubular Hooping Station, unlike the ironing board, is strong, and sturdy, and it holds your hoop. It has two sides for two different sizes of tubular items. It also comes completely apart for storage.
What else? It’s designed to be compatible with the Perfect Alignment Laser, to take the guesswork out of getting things straight and centered. It can also be transformed into a pressing station with the addition of the wool pressing mats that are sold separately.
I admire Eileen’s ability to work through the process and create a functional tool that works for so many applications and people.
Here are some of my favorites items for hooping, including a number of her inventions.
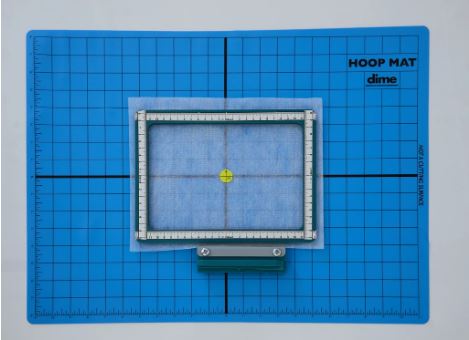
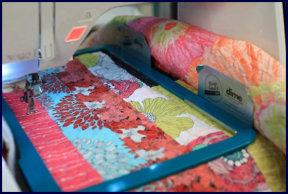 Hoop Guard -- it’s a sewing field guard, really. When I stitched those Christmas stockings, I only opened the cuff seam, rather than open the entire length of the stocking. That saved me steps in stitching up later, but it created a new issue with the bunches of top cuff fabric needing to be pushed or pulled out of the sewing area during embroidery. The hoop guard is made for that. Use it when dealing with bulk that sits on top of the machine during embroidery, to prevent it from wandering into the hoop. For example, with bath towels, onesies, tote bags, Christmas stockings, beanies, and really any tubular item. There are Hoop guards for the snap hoops and also for standard hoops.
 Print and stick Target Paper -- I don’t use a laser (yet) and I cut my teeth on templates and stitched samples over two decades ago. I’m comfortable with templates and target stickers. This is the Cadillac of printed templates, and it’s a wonderful combination of stickers and templates. No pinning, no taping. No guessing from a wee little sticker whether the hooping is straight. The large target sticker you can print will eliminate those issues. If you’re printing templates anyway, you might love this paper for saving you time and energy.
Printable Templates -- I’ve been using these for over 20 years. It’s an awesome way to visually place your embroidery design on the item before committing to stitching. It used to be a little bit rare for an embroidery program to be able to provide us with actual size templates, but that’s no longer the case. You can get actual sized templates from Embrilliance programs, for example, and the free Embroidery Tool Shed will also let you print templates. And don’t think that just because you are getting a laser for alignment that you won’t also want templates. Each gives you different information. You might find that you like to use them together.
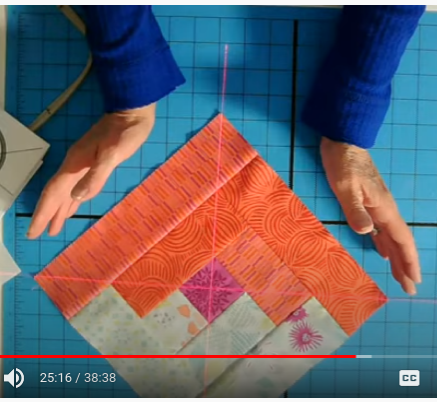 Perfect Alignment Laser -- Like I said, I don’t use one, “Lasers?! For Embroidery?!” but I keep seeing it demonstrated, and I’m not scared of it anymore. Well, think of it as about as technically involved as a flashlight on a stand. It just gives you a beam of light that shows you where exactly straight vertical, and straight horizontal are. It doesn’t need to communicate with your embroidery machine or be calibrated to your hoop or anything. It’s a light on a stand. Simple, really. That’s my favorite thing about it. It’s simple, even if it looks really cool.
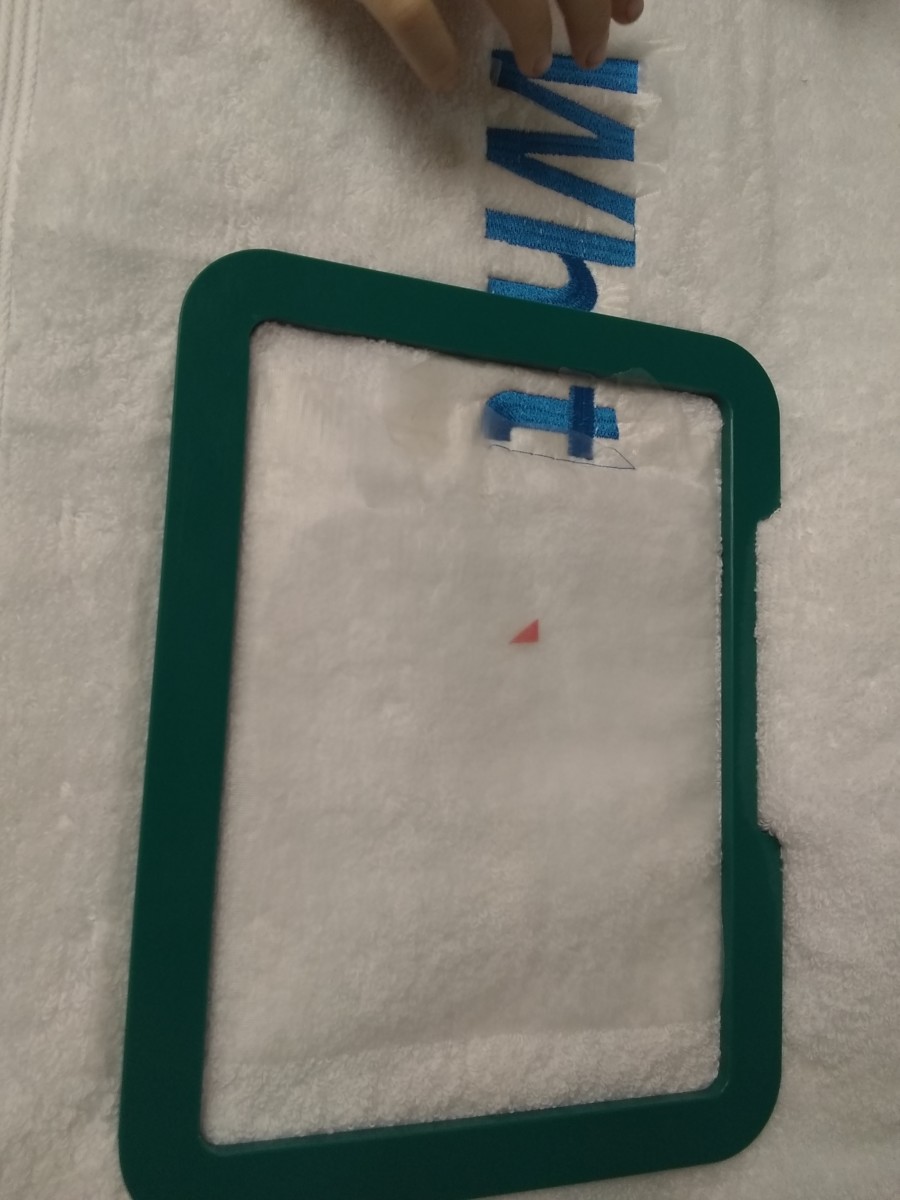 Magnetic Hoops -- Magnetic hoops make thick things easy to hoop, they improve results in continuous embroidery, they stop the “hoop burn” issue that was so common on towels and velvets. Treat yourself to a magnetic hoop. It might change your embroidery life.
To illustrate, I’ll share my “uphill both ways” story now, so you can see why I really truly appreciate magnetic hoops. I first worked in an embroidery shop that had a 12-head embroidery machine and a 6-head embroidery machine. We could stitch 18 copies of the same design at once on 18 different items. That meant that a lot of hooping needed to be done. Here’s the thing, hooping 12-18 items at a stretch all day long is physically demanding. Different hoops had different tensions, and of course you wanted everything to be hooped just right so that it didn’t either fall out before embroidery was finished, or pucker after the hoop was removed. I’d sometimes hoop something two or three times before it was correct. And that was on the easty stuff.
Tee shirts were one thing, and bag panels and sweatshirts could be another. I brought my weight into the job to help me get the necessary pressure for hooping those. Leverage is an awesome tool. Eventually we got a hooping press which really helped with the pressure, but took the feel out of it -- it was hard to tell if the hoop had the right tension set before hooping. If the tension was too high, the press just might break the hoop.
If only we’d had magnetic hoops back then! I now have a couple of magnetic hoops, and I can tell you they have completely removed the dread with which I would often approach hooping. Especially on a project that requires multiple hoopings.
The magnetic hoop that I use the most often is the Snap Hoop Monster. I can hoop towels and velvets without worrying that the nap will be squashed and leave a ring that will probably come out after laundering, but doesn’t look nice on a gift or a sale item. I can do continuous embroidery if I want, and big, thick items don’t scare me anymore because all of the strength necessary comes from the rare earth magnets embedded in the upper frame.
That’s it! What are your favorite hooping helps, tricks, and devices?