Embroidery Special FX (Effects) May 17
Watch: 
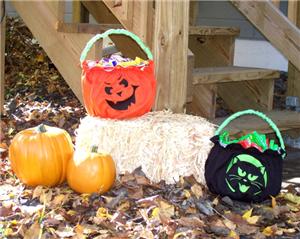
Jack-O-Lantern Treat Bucket
Using designs from Starbird's Jack-O-Lantern Design Pack, make spooky treat buckets!
1:
You will need an empty five quart ice cream bucket, enough orange or black fabric for a 7 3/8" diameter circle and a 38" x 9 1/2" rectangle, a 20" x 2" strip of green fabric, and 25 1/2" piece of 3/8" elastic.
2:
Let's begin by covering the bucket handles. Here you need the green piece of fabric 20" long x 2" wide. Fold it in half lengthwise with the right sides of the fabric together. Stitch a 1/4" seam along the 20" open edge.
3:
Now you have a long tube of inside-out fabric. Turn it right side out.

4:
Remove the handle from the ice cream bucket and slide it into the handle cover you have just made.
5:
Then tuck both raw ends under approximately 1/4" on both ends. Set aside until the bucket cover is finished.
6:
Next, we'll make the bucket cover. Cut a piece of fabric 38 1/2" wide x 9 1/2" long, and fold lengthwise with right sides together.
7:
Sew 1/4" seam, the width of the fabric to create the back seam.
8:
At the bottom of the fabric (using the long machine stitch) sew a row of stitches 1/4" from the raw edge of the fabric. Sew a second row of stitching between the 1/4" row and the raw edge.
9:
Divide this fabric tube into 4 equal sections and mark each section with the removable marker or pencil.

10:
You can now embroider the design on the fabric. Center the design on the fabric, opposite the back seam you have made.
11:
From fabric, cut a 7 5/8" diameter circle. Then with a removable marker or pencil, divide the circle piece into four equal sections.
12:
With the right sides of the fabric together, pin the circle piece to the bottom of the larger (seamed) piece of fabric at each quarter marking. Gather the larger piece of fabric to fit each quarter section of the circle piece as you pin.
13:
Stitch the two pieces of fabric together at the 1/4" seam line.
14:
At the upper edge of the fabric make 1/4" rolled hem.
15:
Make a 1/4" button hole 9" from the back seam on both sides of the seam and 1 1/4" from top finished edge.
16:
Overlap the ends of the elastic by one inch, then stitch the overlapped ends together.
17:
Fold elastic into quarters and mark each quarter section with a straight pin.

18:
Pin the elastic on the inside of the bucket fabric with the upper edge of the elastic placed one inch below the hemmed top edge. Stretch the elastic to fit and sew into place.
19:
Next, place the fabric cover over the bucket aligning the button holes with the holes for the handle.

20:
Attach the covered handle at the button holes, and the bucket is finished, ready for trick-or-treating fun.


 Jack-O-Lantern Face #3
 Spooky Cat Face
 Jack-O-Lantern Design Pack
 Pirate Eye Patches
 Halloween Appliqué Treat Bags
 Witchy Treat Jar Topper
 Halloween Candy Tote
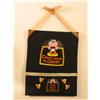 Halloween Countdown Wallhanging


