Software Success: More about the new Edge to Edge Plugin
Watch: 
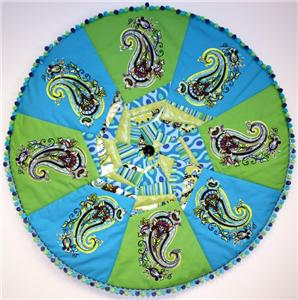
Paisley Floor Pillow
The funky floor pillow with Anita Goodesign's "Paisley Daze" set will brighten up your home. No matter what colors you choose to embroider these design with they are sure to look great. We chose bright bold colors for these designs. The embroidery for this project is simple -- we only used one design! We hope you enjoy this project and these designs.
-- Steve Wilson, Linda Winzeler and Staff

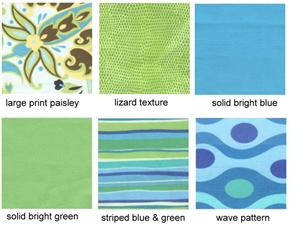
1:
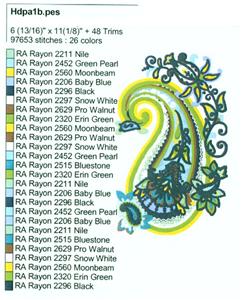
Select fabrics and thread colors to match. Here are the fabrics we picked for this project. The colors we chose for the designs were directly picked from the fabric. Our fabrics included a large print paisley, a lizard texture, a solid bright blue, a solid bright green, striped blue & green, and a wave pattern in blue & green.

2:
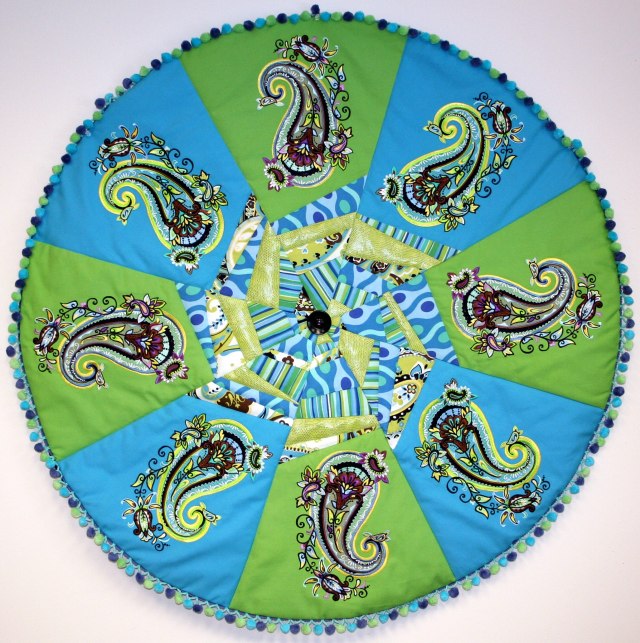
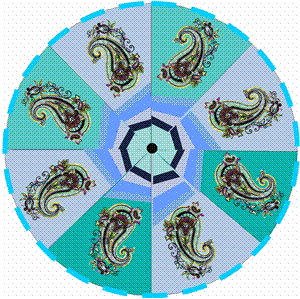
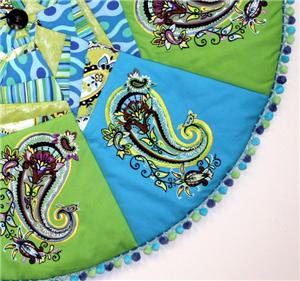
This large circular floor pillow uses a few interesting techniques. The pillow's area was divided into 8 sections, and the large paisley (hdpa1b) was embroidered on each triangle piece of fabric before it was pieced. The interior of the pattern uses a stack and whack technique, utilizing all of the different fabric types.

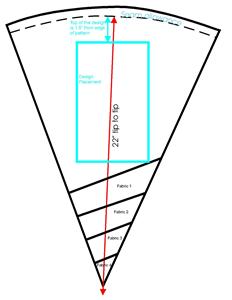
3:
Create 8 fabric wedges. This is the pattern for the floor pillow. The pillow is made of eight identical triangles pieced together to form a circle. The pattern is not actual size but we include the measurements we used so you can create your own. Use a seam allowance with which you are most comfortable. The length of each complete wedge is 22", from tip to top. Notice that the pattern includes four strips of different fabric at the bottom of the wedge. We alternated and used a different sequence of fabric pieces in this "stak and whack" section of each wedge.
4:
Embroider the design on each wedge so that it is centered widthwise, and 1.5" from the edge of the top of the pattern. You can achieve great results with one design simply by alternating the fabric and design color choices.

5:
Now construct the pillow. Stitch the 8 wedges together, side by side until you have a complete circle. Copy the circle onto a 22" square piece of fabric for the back of the pillow. We also added a pom pom fringe around the outside of the pillow for added detail. Place the right sides together, and stitch the two circles to each other, leaving a hole to pull the pillow right side out. Stuff the pillow, and stitch the hole closed.


 Paisley Daze Design Pack
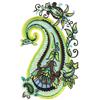 Paisley Motif, larger