What's New Wednesday April 24th
Watch: 
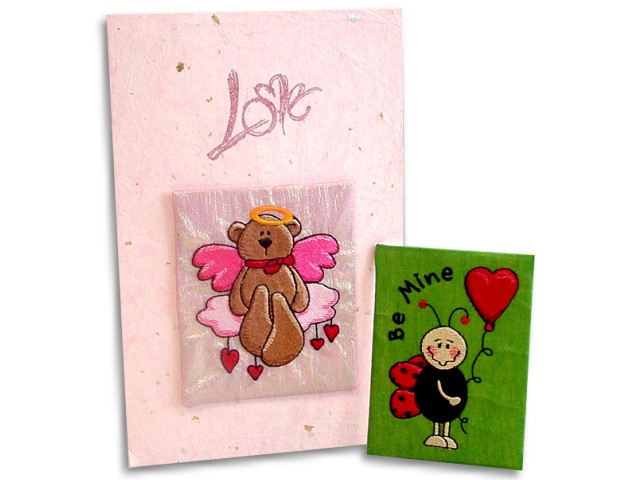
Valentine's Embroidered Cards
These adorable Valentine's cards combine embroidery on fabric and paper cards for a three dimensional look.
1:
SUPPLIES:
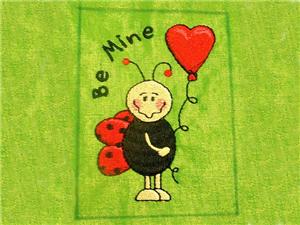
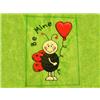
- CH0571 and CH0563 (Be Mine Added)
You can use any design you'd like.
- Fabric (I used Pink Chiffon, White Lame, and Green Shimmer Cotton)
- Valentine's Rubber Stamps
- Rubber Stamp Ink pads
- Card Stock
- Thin Cardboard
- Spray Adhesive
2:
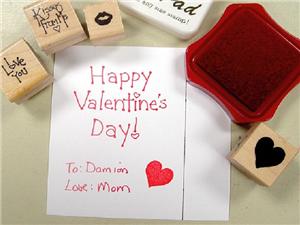
BE MINE CARD - If you notice under supplies it says behind CH0563 "Be Mind Added" I added this text to the original design. If you have the software to add board lettering to stock designs you should be able to do this. If you don't have that software, you can use a rubber stamp or leave it blank.
3:
Hoop your fabric with regular backing and stitch out the design.
4:
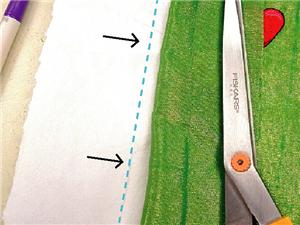
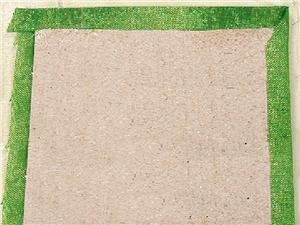
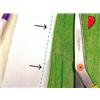
When the design is finished measure out how large you would like your card to be. I measured out 1/4" around the design to give me my dimensions. I used a Mark-B-Gone pen to draw my lines. When you trim the extra fabric off leave about 1/4" extra around the edges. This will be glued and tucked behind the cardboard.
5:
Your pen may bleed through to the backing. This is a good thing. This will give you a guide for cutting your backing to the dimensions needed.

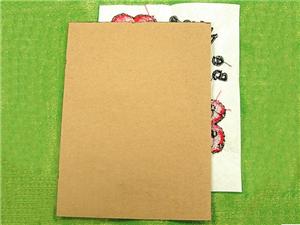
6:
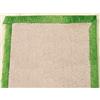
Next, you will need to draw the dimensions you have chosen on a thin piece of cardboard. This will stabilize your card. Cut it out and spray adhesive to the back of your design.
7:
Use the spray adhesive or glue to fold over the extra fabric and adhere it to the cardboard. You'll need to trim down the corners to reduce the bulk.

8:
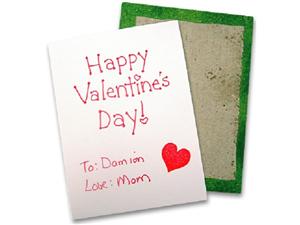
Now comes the creative part. Measure out the dimensions of the card on a piece of card stock. Write or stamp whatever you would like to put on the back of the card. I used markers to write out my Valentine and then used rubber stamps to add detail.

9:
When you're finished cut it out and adhere it to the back of the card.

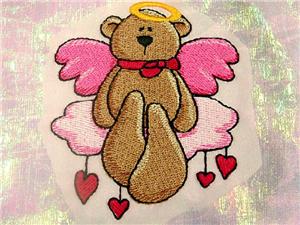
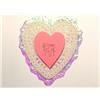
10:
ANGEL BEAR CARD - Lay down the piece of white lame with the piece of pink chiffon on top. The fabrics slide around too much when hooped so, I put a layer of wash away backing between the two fabrics.

11:
After you've sewn the design, trim the wash away backing and rinse. Let dry.
12:
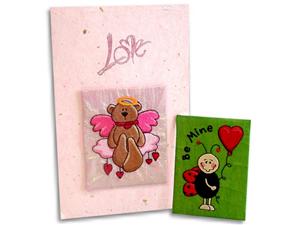
While that dries, you can work on the rest of the card. Too add a little color to the front of the card, I glued a piece of mulberry paper to the white card stock.
13:
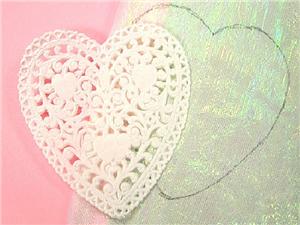
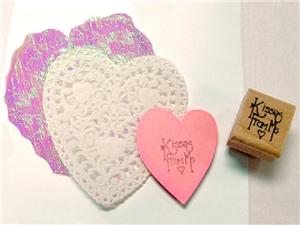
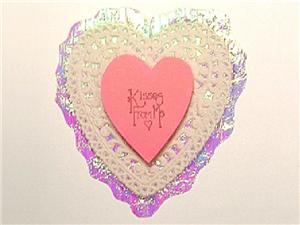
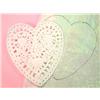
Next I worked on the inside of the card. I found a white paper lace doile. I took a leftover piece of the lame fabric and traced the lace doile on the back of the fabric. When I cut out the heart I gave it a scalloped edge. This is easiest with scalloped-edged decorative scissors.
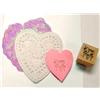
14:
I then cut out a small heart from a piece of pink card stock to put in the center of the lace heart. I used a rubber stamp to add a cute message to the center of the heart.
15:
Glue the three hearts together inside the card.
16:
When the bear is finished drying, figure out your measurements like you did with the "Be Mine" card. (follow steps 3a through 6a)
17:
After you've followed those steps, glue the bear to the front of your card. To finish the card, I used a "Love" stamp to add detail to the top of the front.


 Angel Bear with Hearts
 Lady Bug with Heart Balloon
 Embroidered Paper Technique
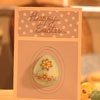 Easter Egg Card Video Demonstration