


Please Login to comment on this post.

 Multiple copies in the Hoop with Tool Shed
 The Scoop on In-The-Hoop
 Lace Jewelry Kit
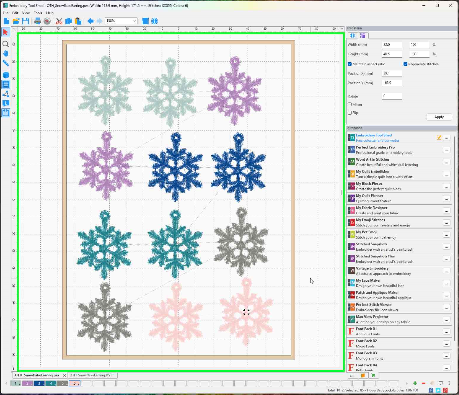
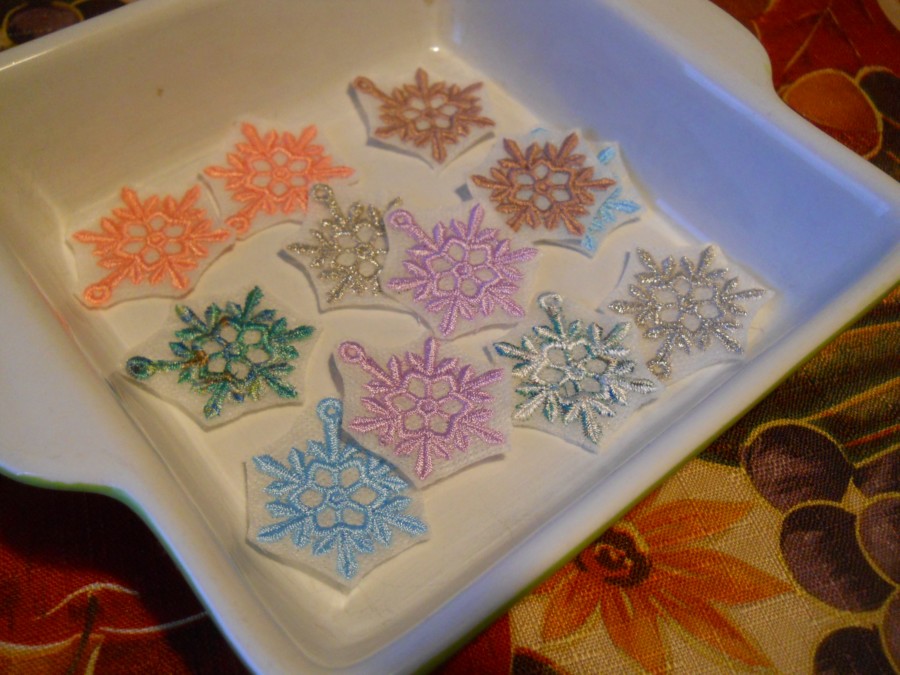
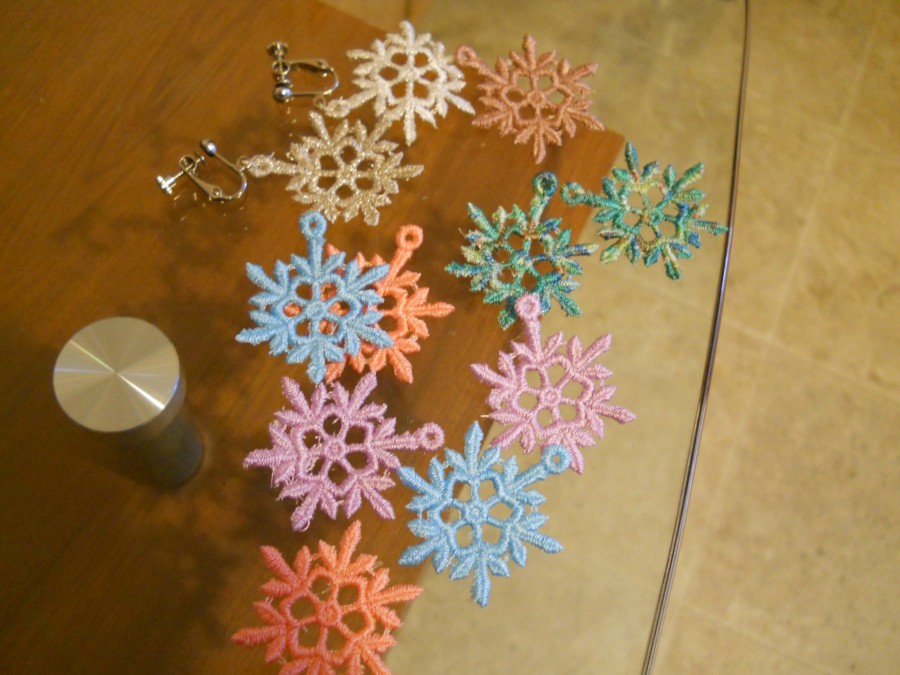
After I arranged my designs in the hoop, so that I had 12 snowflake earrings and two of each color, I hooped some fibrous water soluble stabilizer and picked out my colors. One of the fabulous things about stitching your jewelry is that you can match your thread exactly to any of the clothes you already own. That takes personalization up a notch, doesn’t it? I even used a variegated green thread, for the variety that gives. It’s the one that turned out looking sort of speckled.
These earrings are basically a freestanding lace design, which is one of the quickest, easiest in-the-hoop projects there are. Just hoop, stitch, cut, and dissolve.
After I began stitching, I realized that I could have arranged the colored snowflakes for more efficient stitching and less trimming, if I had thought of that!
See for example, I placed the pinkish purple ones and the darker grey ones in “reading order”, right to left. With the first one at the end of the top line, and the second one where it would be if it were the next word, at the left side of the next line. It would have been more efficient to place them one below the other. The machine wouldn’t have to travel as far from one to the next, and it also wouldn’t leave such a long string of bobbin and top thread for me to trim off, potentially crossing two other designs on the way.
But there it is, and I decided to stay by the machine and pay close attention to trimming as I went. And then when it was finished, I trimmed before removing the stabilizer from the hoop. I like a taut surface; it helps me avoid cutting the stitches while I’m trimming nearby threads.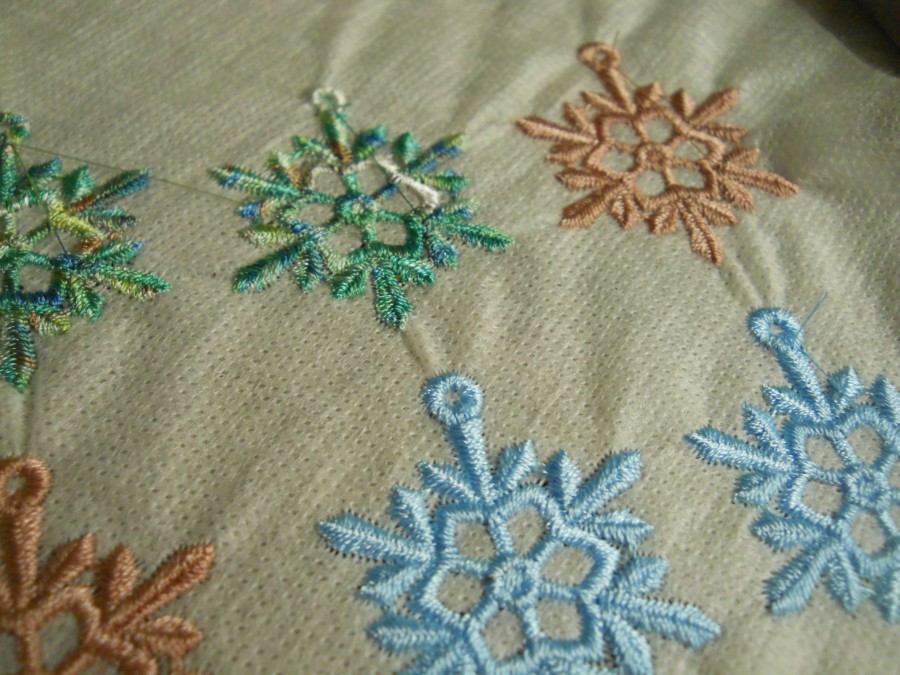
Next, I removed them from the hoop and cut them out.
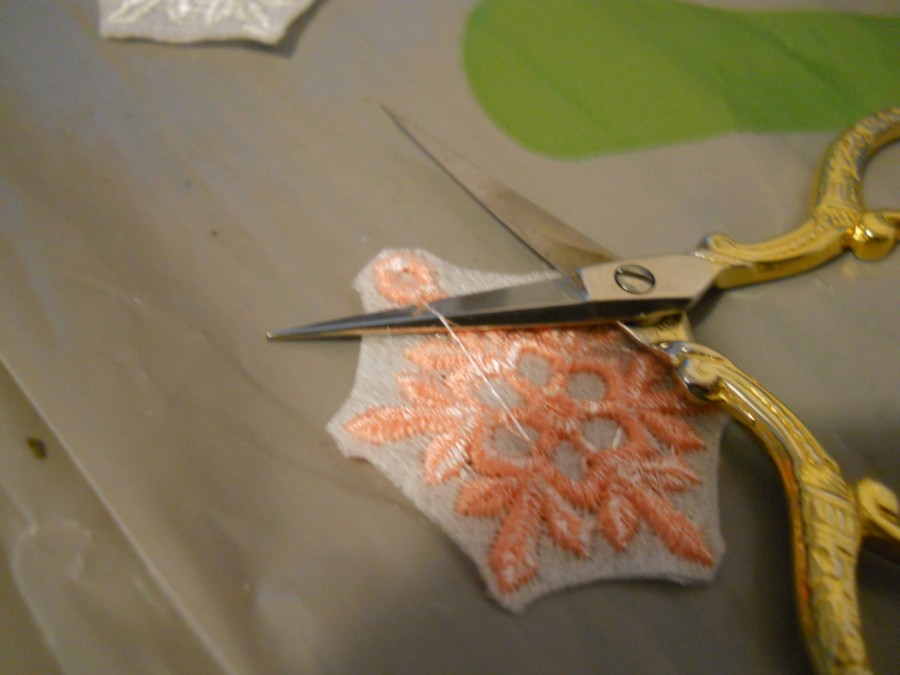
Oh look, I forgot to trim a bobbin thread.
Next I put them all in a shallow dish, ready for their bath. This is my favorite part.
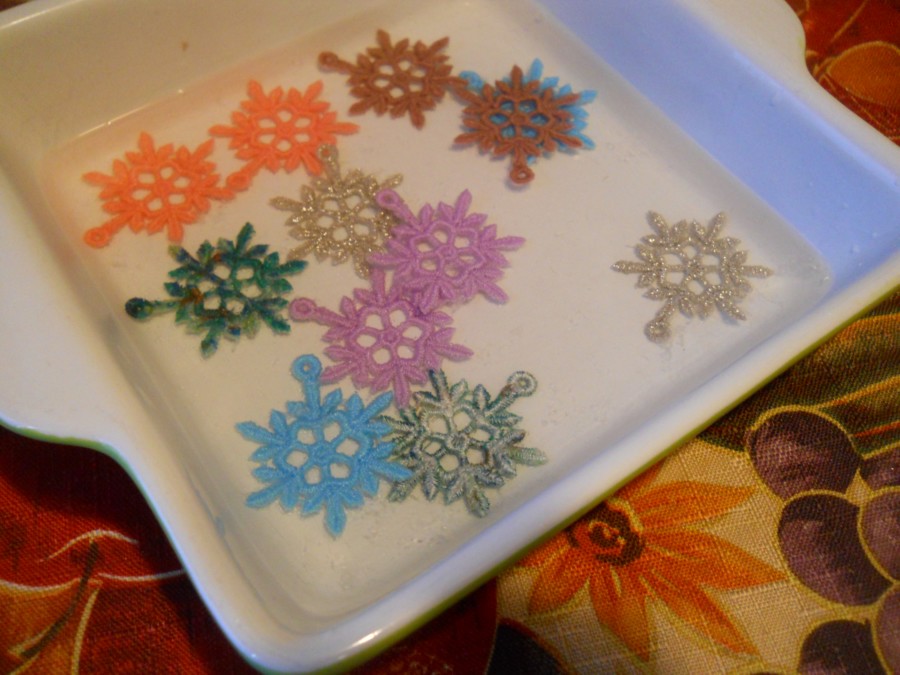
I pour hot water over them and wait. The stabilizer begins to disappear almost immediately, like magic. I can also rub them a bit to nudge the dissolving process along. What is left between the threads will leave my earrings fairly stiff, so that they easily keep their shape and almost even look like metal to an un-trained eye.
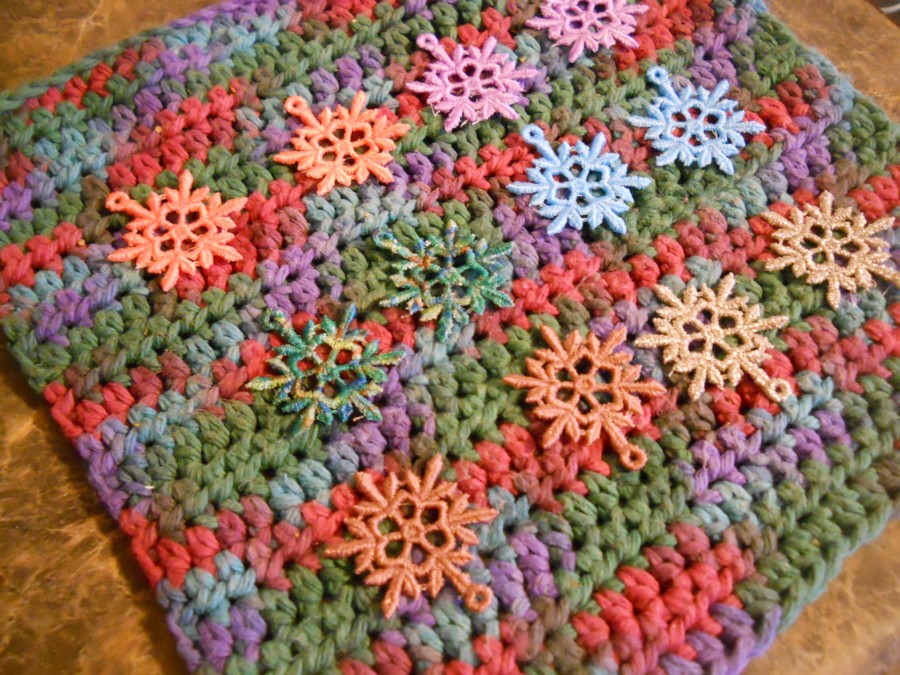
Then I lay them out to dry, taking care to straighten their little snowflake arms, though if I forgot, I could always just moisten them and do that later.
And then they’re ready for attaching the earring hardware. We have some pierced earring hardware available on Embroidery.com, but I opted for screw-back earrings for mine. I attached them with matching thread, but jump rings (included in the earring hardware set) also work.
Et voila!
Notice on my two silver earrings, one is upside down in the photo, and you can see that I didn’t match the bobbin thread to the top, so my earrings have slightly different colors from side to side. If you want though, you can match the bobbin thread to the top thread before you stitch. With a hoopful of different colors, of course that means changing the bobbin every time you change the thread. And if you opt to match your metallics in the bobbin, I recommend using Kingstar metallic in the bobbin. It’s the only metallic thread I know of that is smooth enough to use in that way without major hassles.
Enjoy your own snowflake earrings!