How to attach your project fabric to the EZ Stitch Webbing Scroll Rods
How to attach your project fabric to the EZ Stitch Webbing Scroll Rods.
First I am going to zig-zaged the edge of my fabric as it has a raw edge this will give it a more stable base. If your fabric is surged or you have a bias edge you will not need to do this.
You can either hand sew or machine sew your fabric to the webbing.
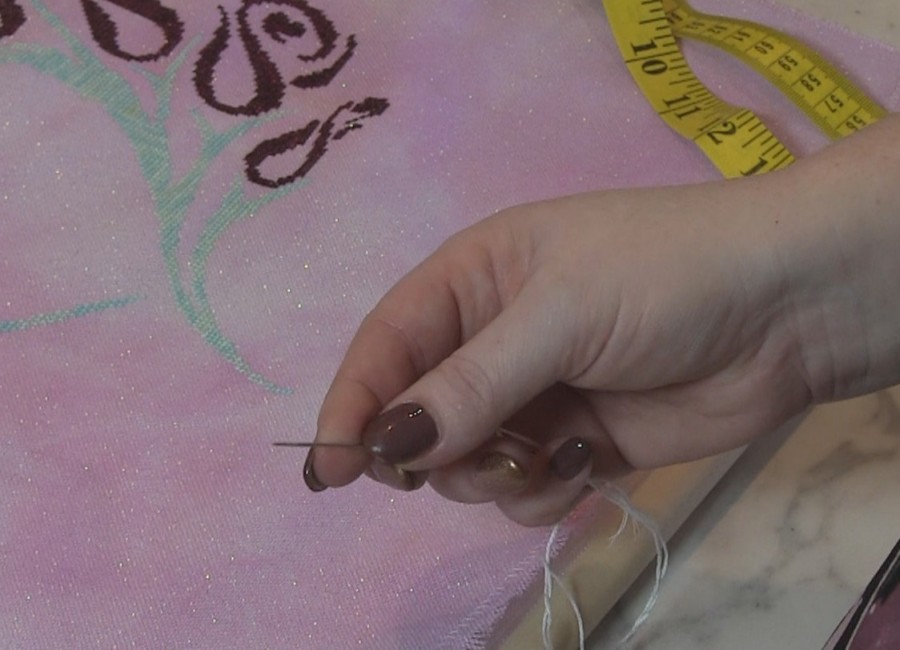
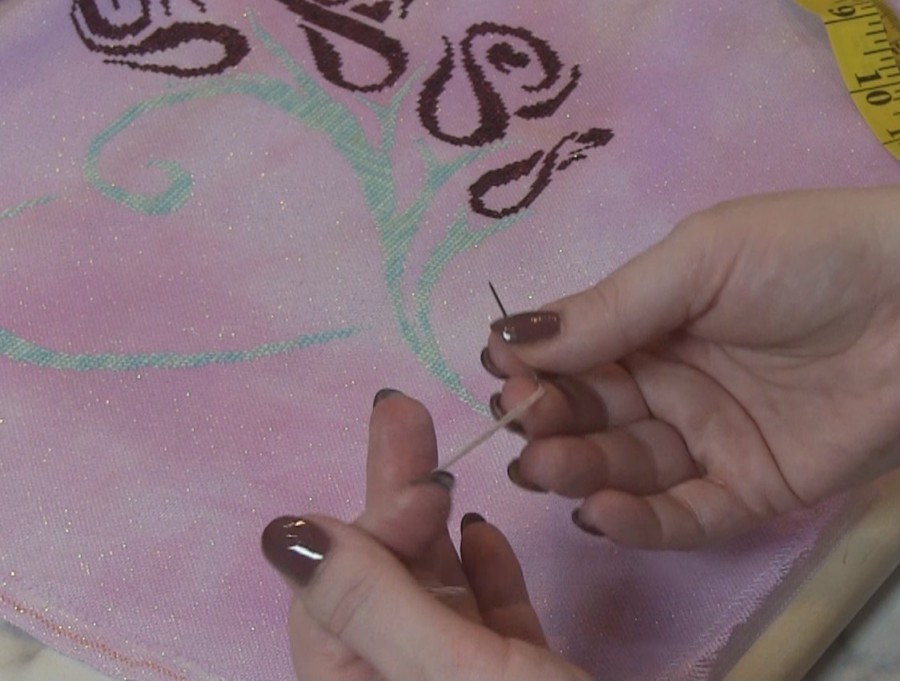
For hand sewing I will be using a Chenille needle as it has a sharp point that I will need to go through the canvas. I am also using all 6 strands of regular DMC Floss. I know I am going to have to push pretty hard to get the needle through the canvas so I will also be using Thimble-its to protect my fingers.
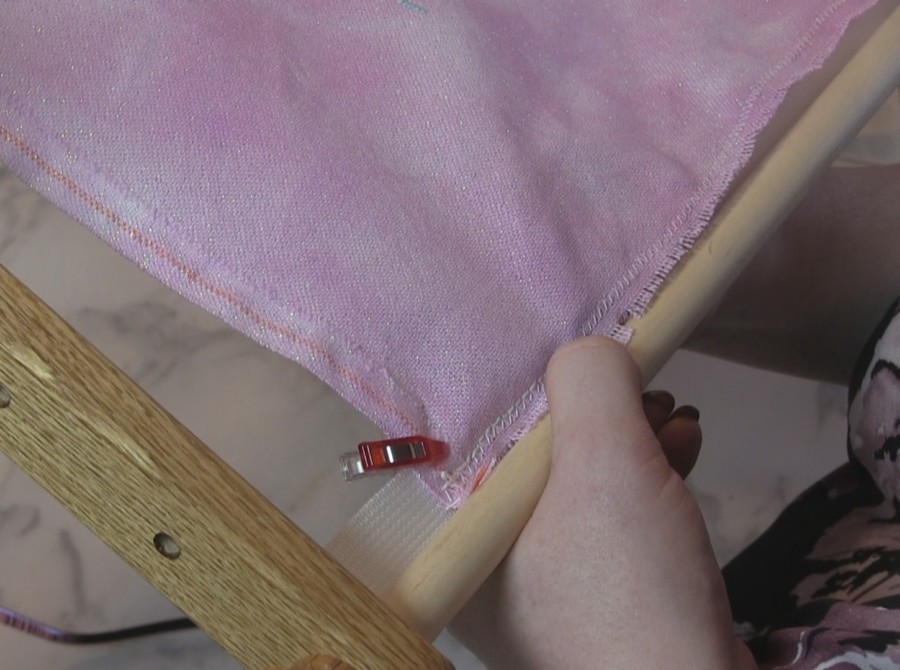
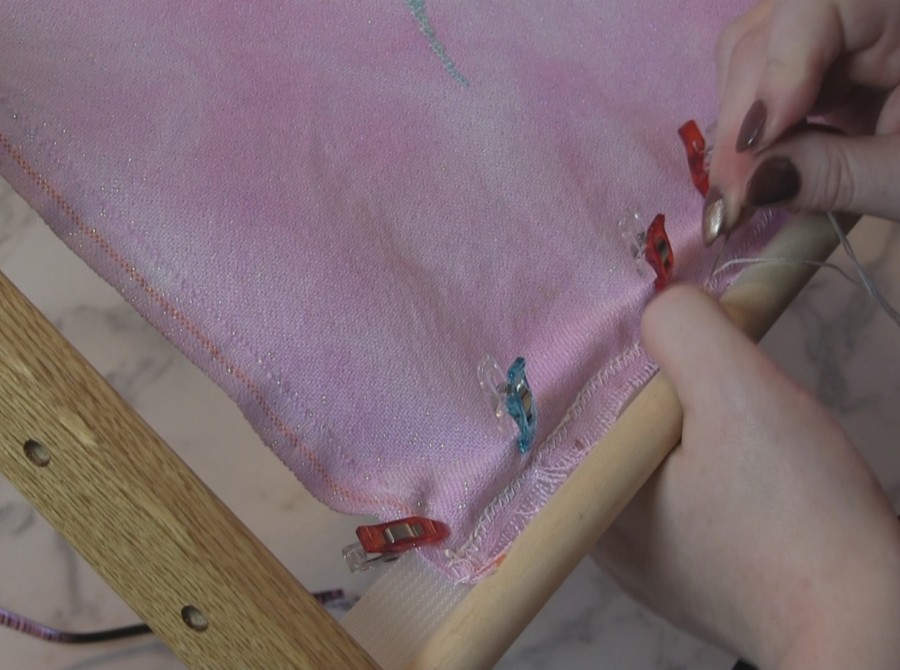
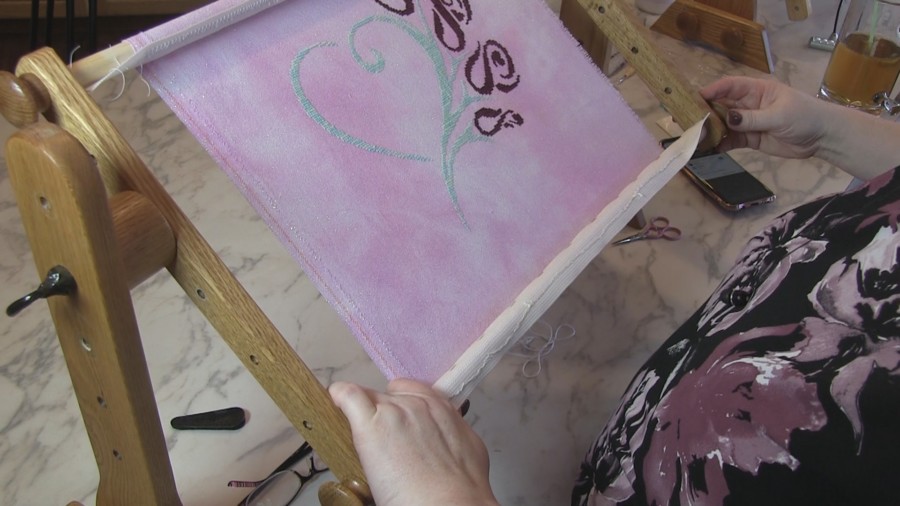
I am using my EZ Stitch Lap Stand this will help hold my fabric while I am stitching it. Also I don't have to keep a hold of the scroll rod as it is now stable in the Lap Stand. Now all I will need to do is stitch the fabric to the webbing. I am also using Wonder Clips to hold my fabric in place along the webbing.
I am using a back stitch and using the zig-zag stitch as my guide coming up at each peak. It took me about 1 hour and 40 minutes to stitch one side of the fabric to the scroll rod.
When I use the EZ Stitch Tape for Fabric I will place it on the front of my fabric. I do this so when I scroll it up the front is now protected. After all the front is what we are all going to be looking at and we want to be as clean and fuzz free as we can get it.
So when using the Webbing Scroll Rods I will attach my fabric to the top inside of the webbing. This way if anything gets dirty or has some wear on it, it will be the backside. I also use the Scroll Rod covers to help eliminate any dirt or wear that might happen. But by scrolling it up this way I ensure that the front is kept clean and protected.
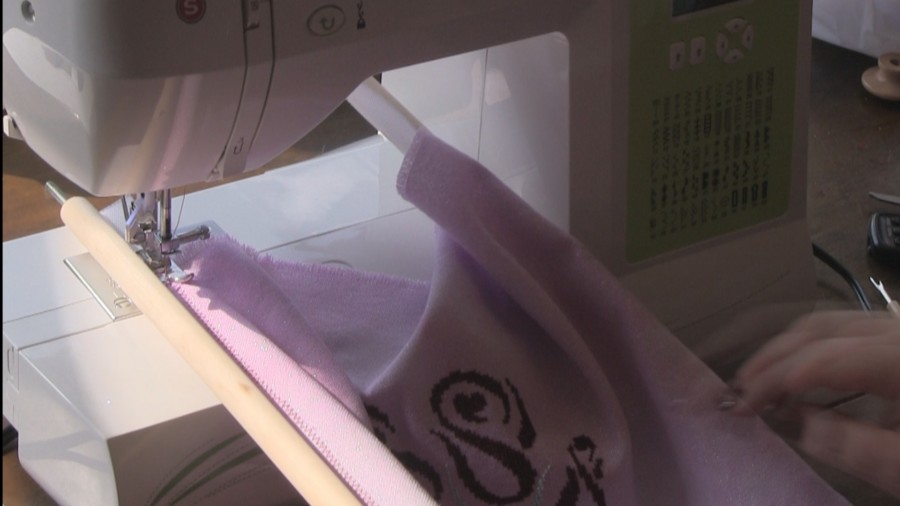
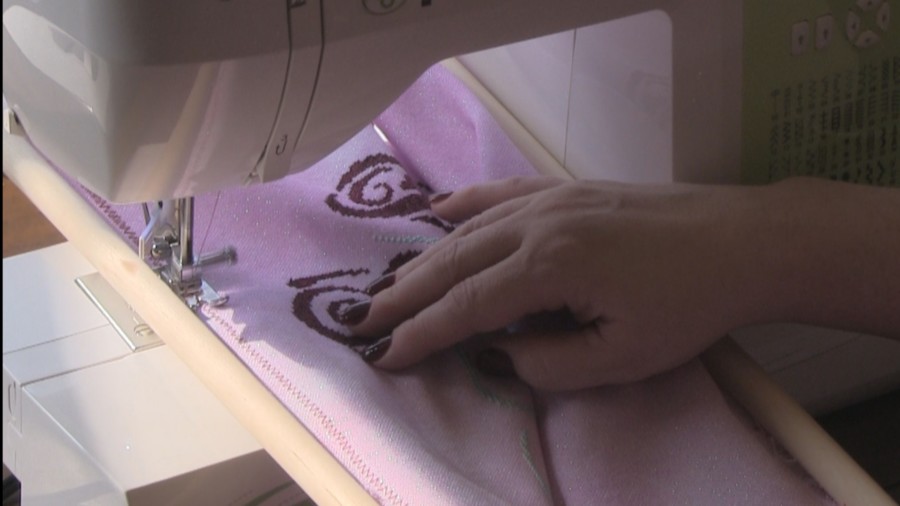
For machine sewing I use a zig-zag stitch to attach my project fabric to the webbing. I think this again will provide a more stable base for the tension I like.
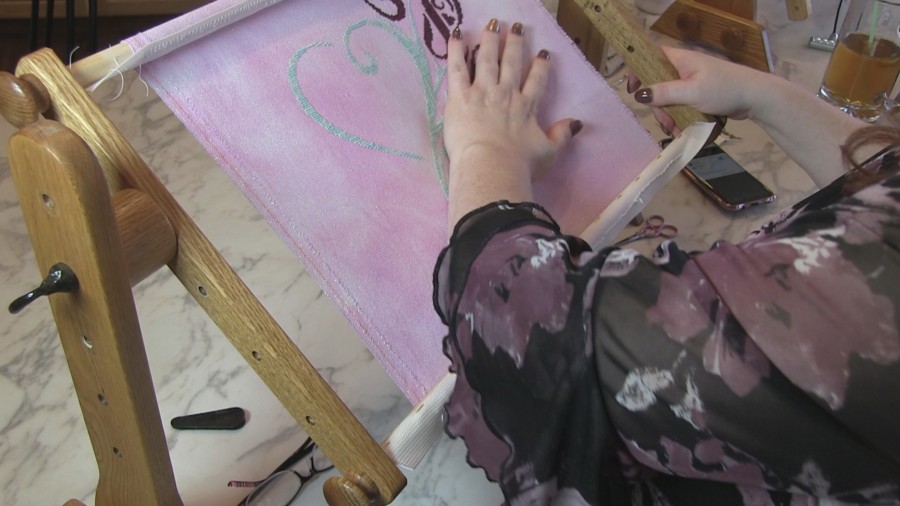
I like super tight tension and with the EZ Stitch Scroll Frames you can have whatever tension you like. No matter if you are using the Tape version or Webbing Version. Once you have the fabric scrolled up on the rods tighten all 4 knobs. Then push down the middle of the fabric, This will cinch up the fabric on each of the Scroll Rods, making it wrap tighter around them.
Scroll the fabric back up around each rod tighten the knobs down and push down in the middle again. Do this until you have the tension that you like.
Once you are finished with your project use a seam ripper to take out the zig-zag or the back stitch that you attached your project fabric to the webbing with. Now you are ready for your next project.
All of our EZ Stitch Products are solid Beautiful American Red Oak and hand finished with golden oak oil stain. Making them all a beautiful piece of furniture while creating the perfect stitching tool.
Thanks for joining us and as always, I love to hear your comments suggestions so please feel free to send them to me at [email protected].
Happy Stitching - Donnett
Joanne K.
Hi Donnett, Thank you for a fabulous stitching site!!
I have a question about scroll frames. I’m new to using them and I have watched your video clips on it, again thank you. But I find the scroll frames flatten my stitches. Is there a remedy for this?
Do you answer direct to my email address or will the answer be posted here somewhere? I’m not that well versed in how this works.
I have found that once I am finished with my project and take it off my scroll frame, a good shake will bounce all of the stitches up.
I also use a mascara wand, which you can purchase them on amazon, and just lightly brush it over your stitches it will fluff them up. It will perk up the fibers and make them stand out!
Let me know if you have any other questions. Happy Stitching


Joanne K.
Hi Donnett,
Thank you for a fabulous stitching site!!
I have a question about scroll frames. I’m new to using them and I have watched your video clips on it, again thank you. But I find the scroll frames flatten my stitches. Is there a remedy for this?
Do you answer direct to my email address or will the answer be posted here somewhere? I’m not that well versed in how this works.
I appreciate your time and assistance!
Joanne
[email protected]