

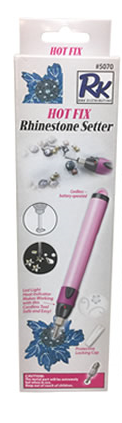
 Hot Fix Rhinestone Setter
 Seeing Double for Winter (PJ's In-the-Hoop)
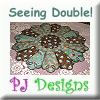 Seeing Double! (PJ's In-the-Hoop)
 Hemingworth WashAway - Hot Water Soluble Backing 12 in X 27 yds
 505 Spray & Fix Temporary Fabric Adhesive

No, it does not, Earlene. This purchase is just the designs (for download and on a small CD) along with 6 spools of thread. Thanks for the question.
~Heather
[email protected]
02/07/20 05:40 pm MST
Please Login to comment on this post.
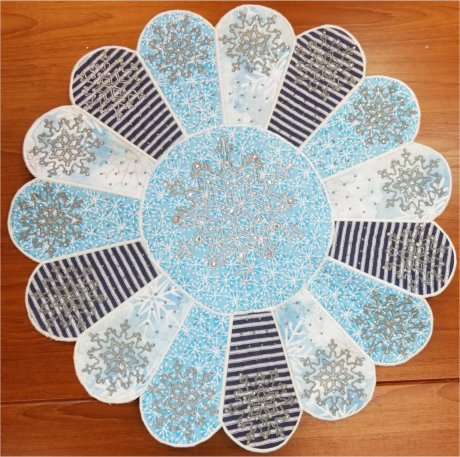
Join Donnett & DeeAnn for this week's Project Video featuring Seeing Double for Winter by PJ Designs.
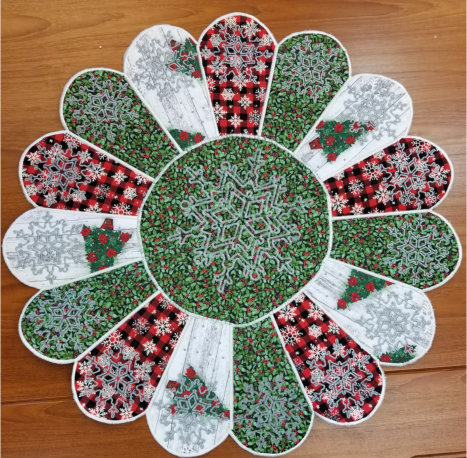
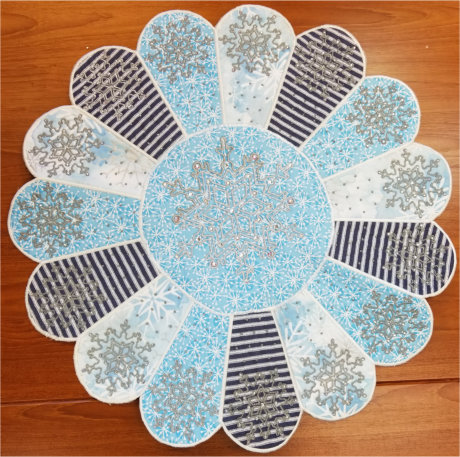
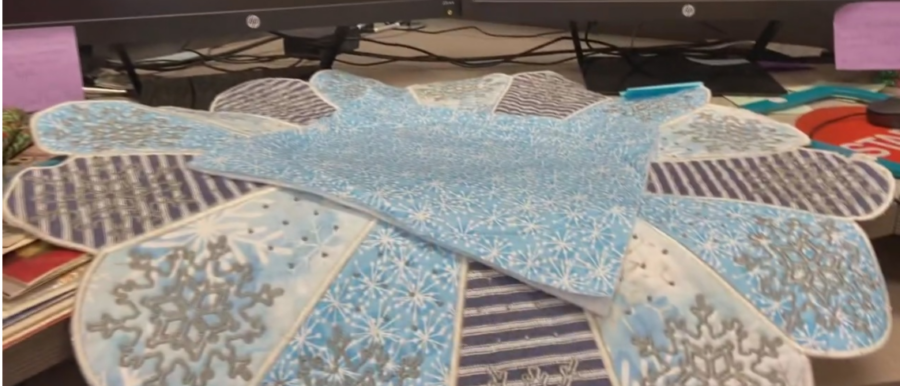
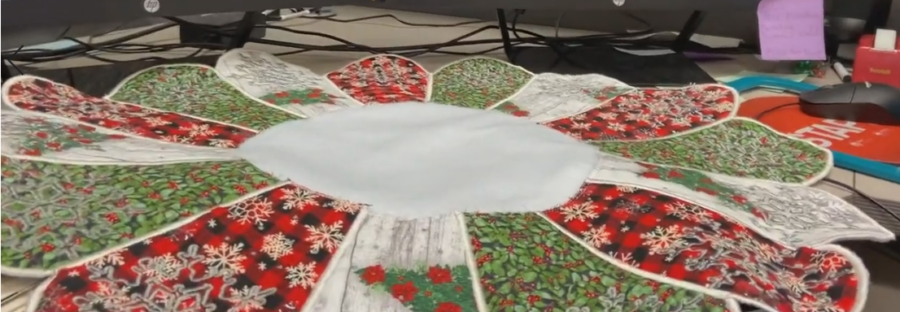
Seeing Double for Winter is an beautiful holiday/winter table topper. This table topper is two-sided, providing for Christmas or winter, with 15 outside panels and a large center circle. Once finished, this table topper measures out at 25 inches in diameter.
Donnett: Walk us through the first steps of this table topper.
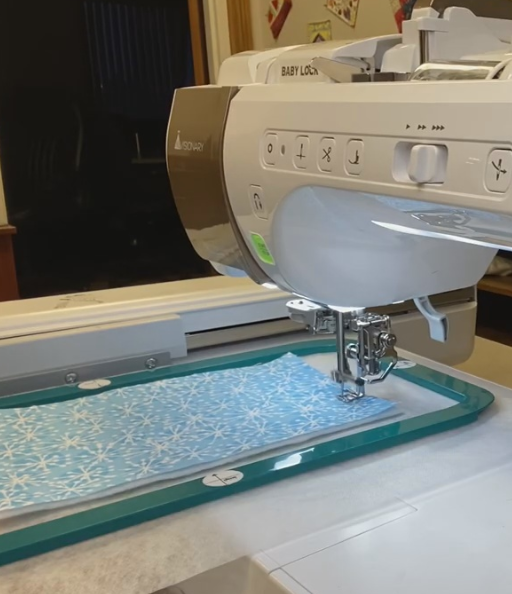
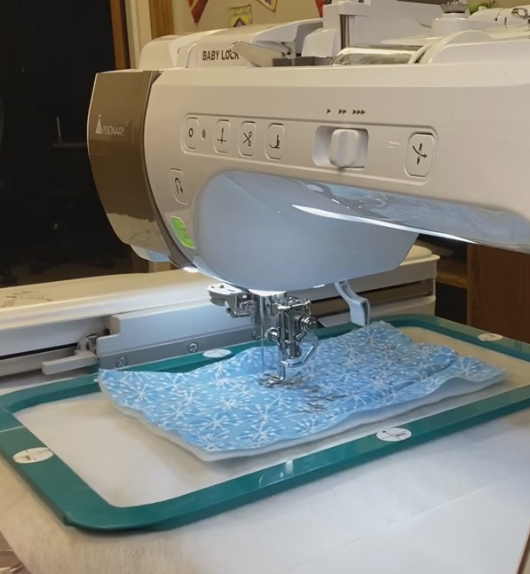
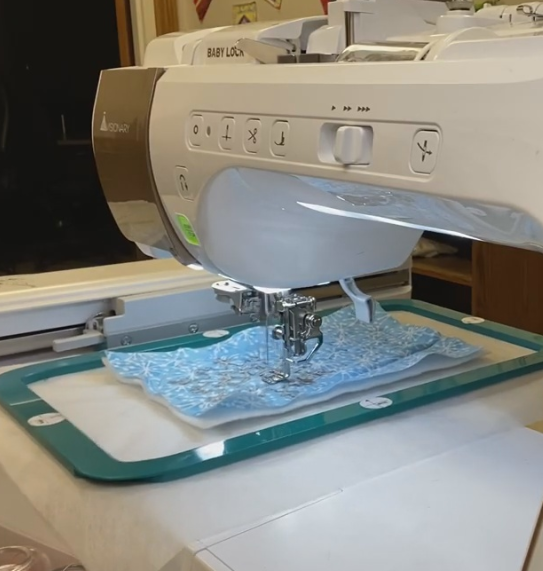
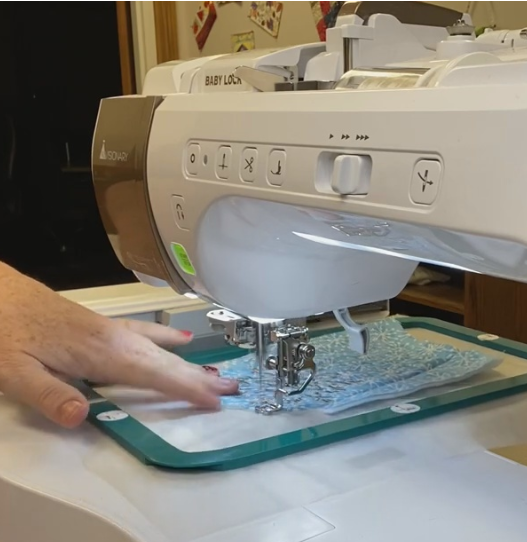
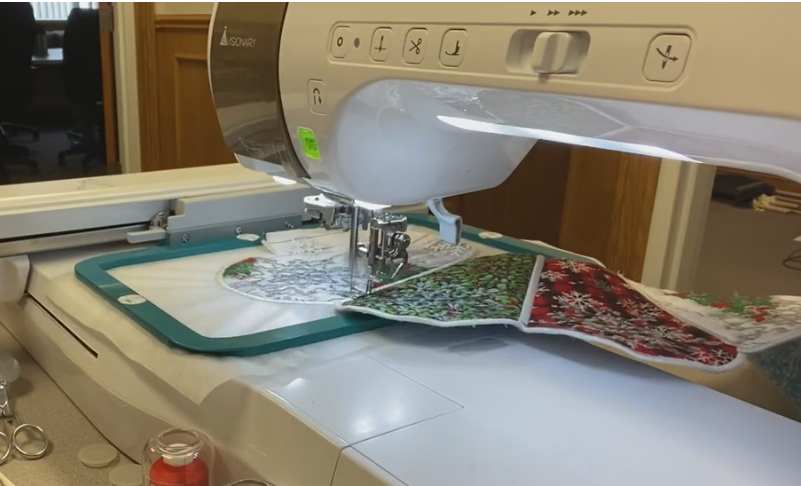
DeeAnn: First hoop your stabilizer, which I used a Wash Away. Then, stitch out the outline stitch.
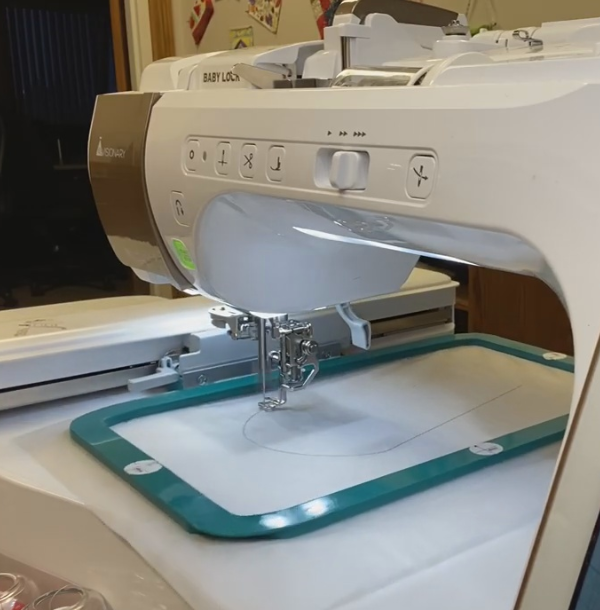
Then, using 505 Spray & Fix Temporary Fabric Adhesive, I sprayed the back of the stabilizer and put my back or my Christmas fabric on.
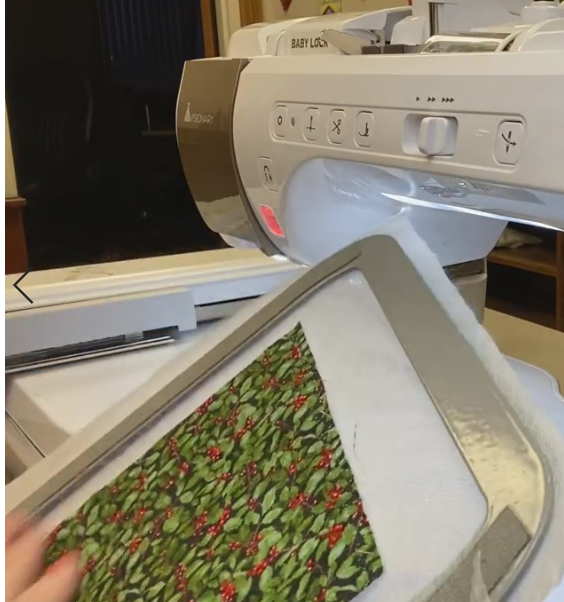
Then [I] sprayed the front, placed the hoop back in the machine, laid down the batting, then placed the front or winter fabric and did the tack-down stitch.
Then it will stitch out the dots and snowflake. Once that is complete, you will cut off the extra fabric on both sides of the hoop on the round part of the panel and up one side. Then you will stitch the satin stitch around that edge.
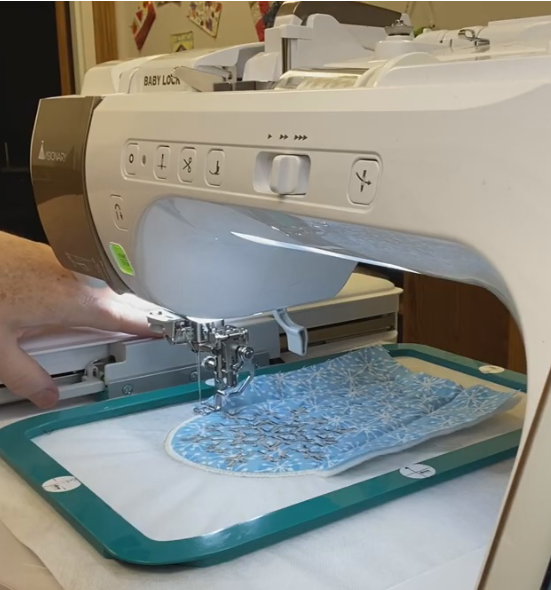
Donnett: Then you just repeat that process for each of the following panels. It's just all pieced in the hoop.
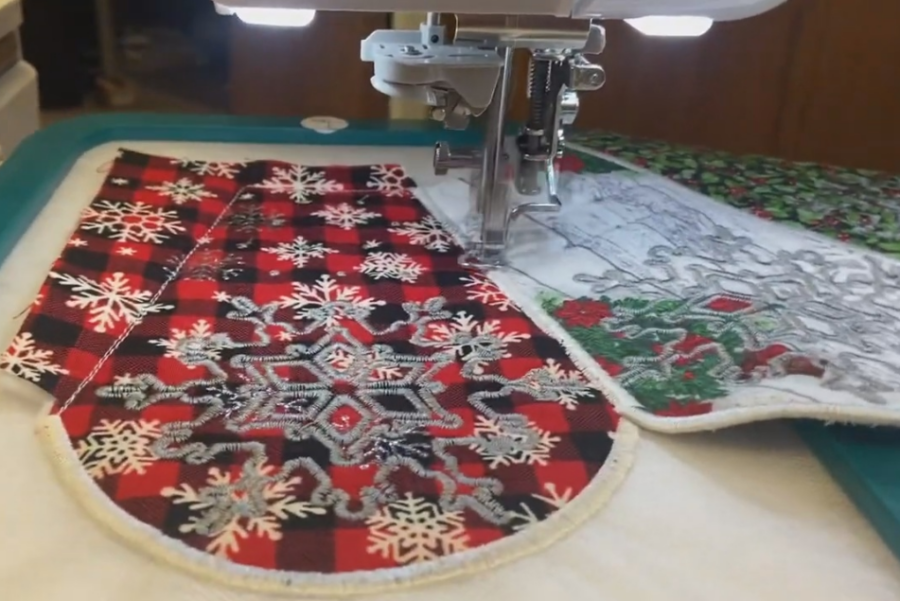
DeeAnn: Yes, you will just add it and add it 'til you get to the final panel, panel 15. Once the snowflake is stitched out, you will cut up both sides and then attach panel 15 to panel 14 and then panel 15 to panel one, completing the circle.
Donnett: So, how do you do the center piece?
DeeAnn: You get the batting and the fabric that matches, pin that in place, then flip the whole design over. Then, with a regular sewing machine stitch, you sew it around creating the circle. Trim your extra fabric and repeat the process for the other side. Now you will be able to do a satin stitch around that inner circle.
Donnett: Once that is completed, you can stitch out the large snowflake. And then you're done.
DeeAnn: Yes, and then you are done.
Donnett: And you have any amazing large new table topper for Christmas and winter... But be didn't stop there.
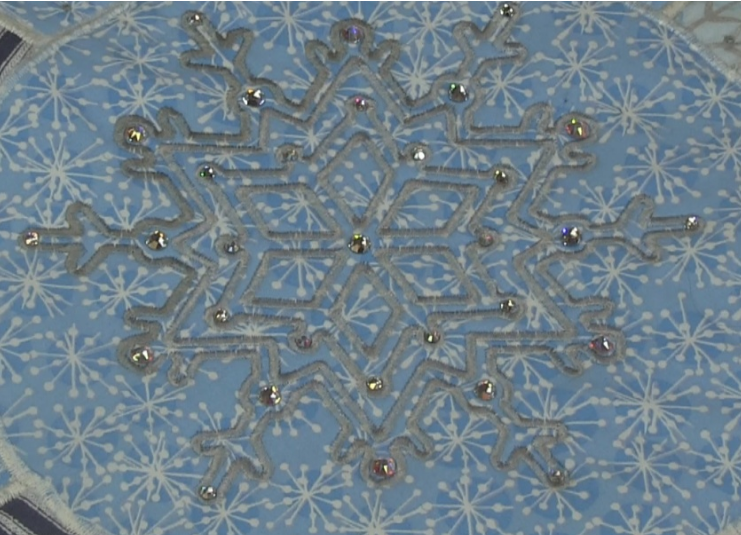
DeeAnn: No, I brought it in to you and you had the idea of adding crystals and bedazzling the entire winter side.
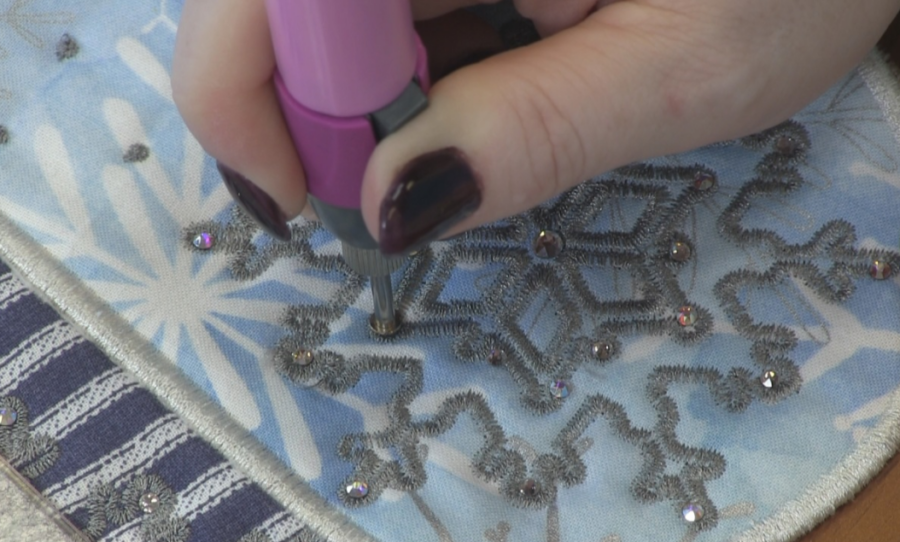
Donnett: We wanted to make the winter side sparkles like snow. So, we got the Hot Fix Rhinestone Setter and some Swarovski Hot Fix Crystals. So, walk us through that process.
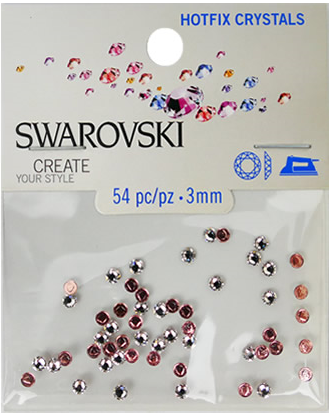
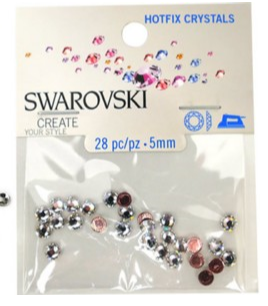
DeeAnn: We got 2 sizes of crystal: a 3mm and a 5 mm. In the small areas, we put the 3mm and in the large areas, we put the 5mm. When using the Rhinestone setter, you need to make sure you position it straight up and down. We used Hemingworth thread to stitch this out and it is polyester which will melt when that much heat is applied.
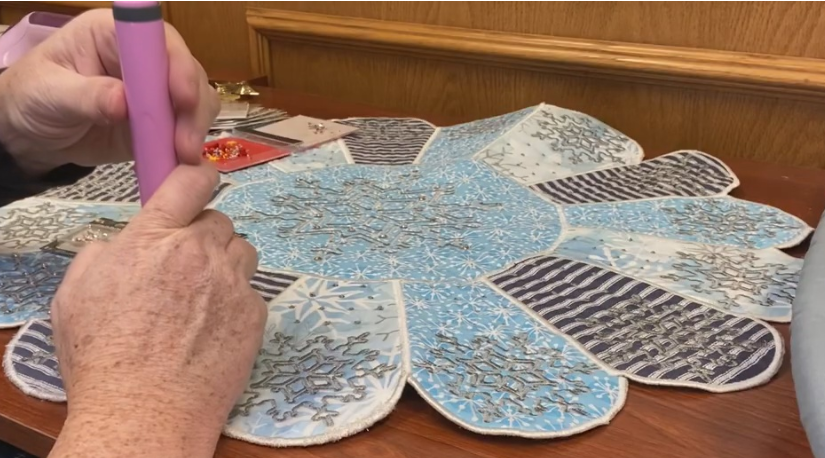
Donnett: The Hot Fix Rhinestone Setter is cordless and runs on 2 batteries.
DeeAnn: It only heats up while the button is pressed. Make sure you are going straight up and down while on the crystal. For the 3mm crystals, hold for 10 to 15 seconds, and for the 5mm, hold for 15 to 20 seconds and it glues them right on.
Donnett: It turned out stunning. No matter if you are putting it on an end table or a coffe table, it is just amazing.
DeeAnn: Yeah, I want to go and sparkle up the Christmas side now!
Donnett: Thank you so much for sharing this amazing project with us.

Seeing Double Thread Set with Design Pack
We have paired this pack with a Hemingworth Six Spool Thread Set featuring Old Gold, Chrome, Christmas Green, Marshmallow, Royal Blue and Christmas Red.

I invite you to take a tour of our Machine Embroidery Finish Gallery on Embroidery.com. It is full of all kinds of inspiration and amazing ideas that you can take and use in your stitching. We love showing off all that our amazing customers have completed. Of course, we would love to add your latest creations to our Finish Gallery-- after all, great works of art are meant for display! Send us pictures of your finished projects to [email protected].
Make sure your notifications are turned on as that's how you will know when new videos are up. As always, I love to hear your comments and suggestions so leave those for me below or you can send them to me at [email protected].
Share your finished projects with us by becoming a member of our Embroidery.com Group on Facebook. And don't forget to like our Embroidery.com Facebook Page.
Check out our past Project Videos in our Beginner's Journey into Machine Embroidery Blog, along with our Machine Embroidery Demos and so much more on my (Donnett's) Machine Embroidery Blog on Embroidery.com.

No, it does not, Earlene. This purchase is just the designs (for download and on a small CD) along with 6 spools of thread. Thanks for the question.
~Heather
[email protected]

These are so fun to do! I bought this design pak many years ago from a dealer in St.Louis when it was first introduced. I have paired easter and early summer,halloween and fall,mardigras and valentines day.All you have to do is find a thread color that is common to both sets of fabrics!
Great to hear, thanks for the feedback, Sandi.
~Heather
[email protected]
I didn’t notice do you use the same embroidery thread in the Bobben as you do the top thread


Yes we switched out the bobbin thread for the same color as the top thread. We used Hemingworth Antique Silver and Eggshell.
Earlene L.
does this come with fabric and a pattern