

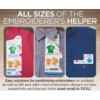

 Embroider's 'Lil Helper
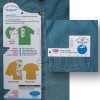 Embroiderer's Helper and 'Lil Helper Bundle

Please Login to comment on this post.
Deborah Jones demonstrates marking placement correctly for straight and well-placed embroidery on shirts. If you're wondering if the Embroiderer's Helper can help you, this is for you. If you are wondering how to use your Embroiderer's Helper, this is the place to be!
Common Mistakes To Avoid:
1. Too low
2. Too close to the arm hole
3. Too close to pocket
To help with these common issues, we have the Embroiderer's Helper, Embroiderer's BIG Helper, Embroiderer's Li'l Helper.
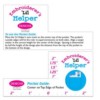
The Li'l Helper is a pocket tool
1. Find the center of your design. Add a half to 3/4" to the distance from center to bottom of the design.
2. You'll use that measurement to find the spot on the tool.
3. Center the tool on the center of your pocket.
Embroiderer's Helper: designed for left or right chest placement (two-sided)
1. On plackets, use the scoop out to align with the top button.
2. Stick a target sticker onto a pin, and slide it under the Helper at the point marked for the size you choose.
3. Use the second notch to mark for straightness, or use the placket and the tool to make a right angle with the straight side of the tool and mark for straightness.
Embroiderer's Big Helper: same as the Embroiderer's Helper, for the extra large + sizes.