Software Success: More about the new Edge to Edge Plugin
Watch: 

Enlarging an Embroidery Design
You may have a design that's perfect for a project except for one thing: it's too small. If making a size change of more than 20%, caution is advised. That can have a negative effect on the way the stitches work with the fabric. A design containing fills and outlines should only be enlarged with caution, and sewing a test sample is highly encouraged. In this project, we'll size a very simple design and show you how to check another limitation -- stitch length.
1:
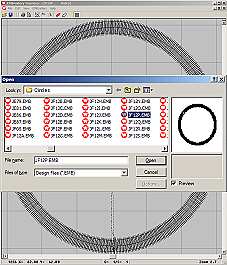
Obtain the Wilcom True Sizer software for this project. Open Wilcom True Sizer. Use the "Open" command on the File menu to bring up the design you will be working with. Best results come of using the EMB format for sizing.
2:
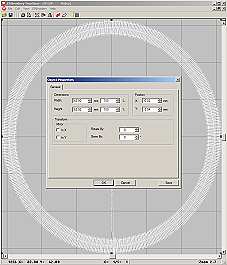
Click the "Select all" icon in the toolbar (it looks like two triangles with a circle). Alternately, use "Select All" from the Edit menu. The selected design will turn white. Open the "Object Properties" window by right-clicking your mouse button over the selected design.
3:
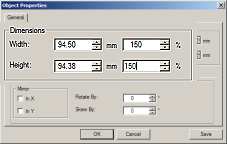
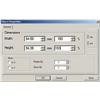
In the "Object Properties" window, you can enter the size change you wish in the "Dimensions" area. Enter either a percentage on the right, or a size measurement on the left. This design is being enlarged to 150% of its original size in our illustration today. Note that we are changing height and width proportionally.
4:
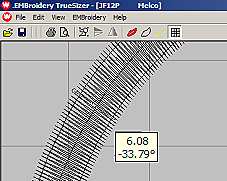
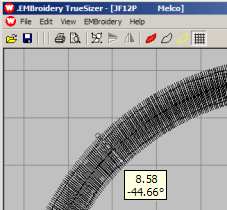
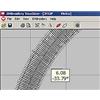
To measure the satin stitch width, press"M"on your keyboard. Click your mouse on one side of the satin stitch, and drag to the other side. The measurement indicator here shows that our satin stitch is 6.08 millimeters wide. Since that is under 7 millimeters, (.27 inches) we'll proceed. To stop measuring, press "M" again.
5:
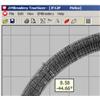
To measure the satin stitch width, press"M"on your keyboard. Click your mouse on one side of the satin stitch, and drag to the other side. The measurement indicator here shows that our satin stitch is 6.08 millimeters wide. Since that is under 7 millimeters, (.27 inches) we'll proceed. To stop measuring, press "M" again.
6:
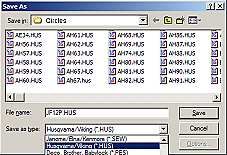
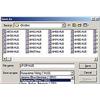
Save the sized file using the "Save As" command in the file menu. You may change the file's name in the box provided, and select the format of your choice from the dropdown list.


 Circle & Oval Borders
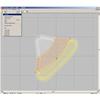 Rotating an Embroidery Design File
  Mirroring an Embroidery Design File
 Centering an Embroidery Design File
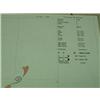 Printing Production Sheets