Welcome, Enthusiast!
Once you have mastered the Essentials, you might be ready to play a little bit
more, explore more advanced functions, and take on a little more challenge. If
this is you, you might be an enthusiast. We named this program after you!
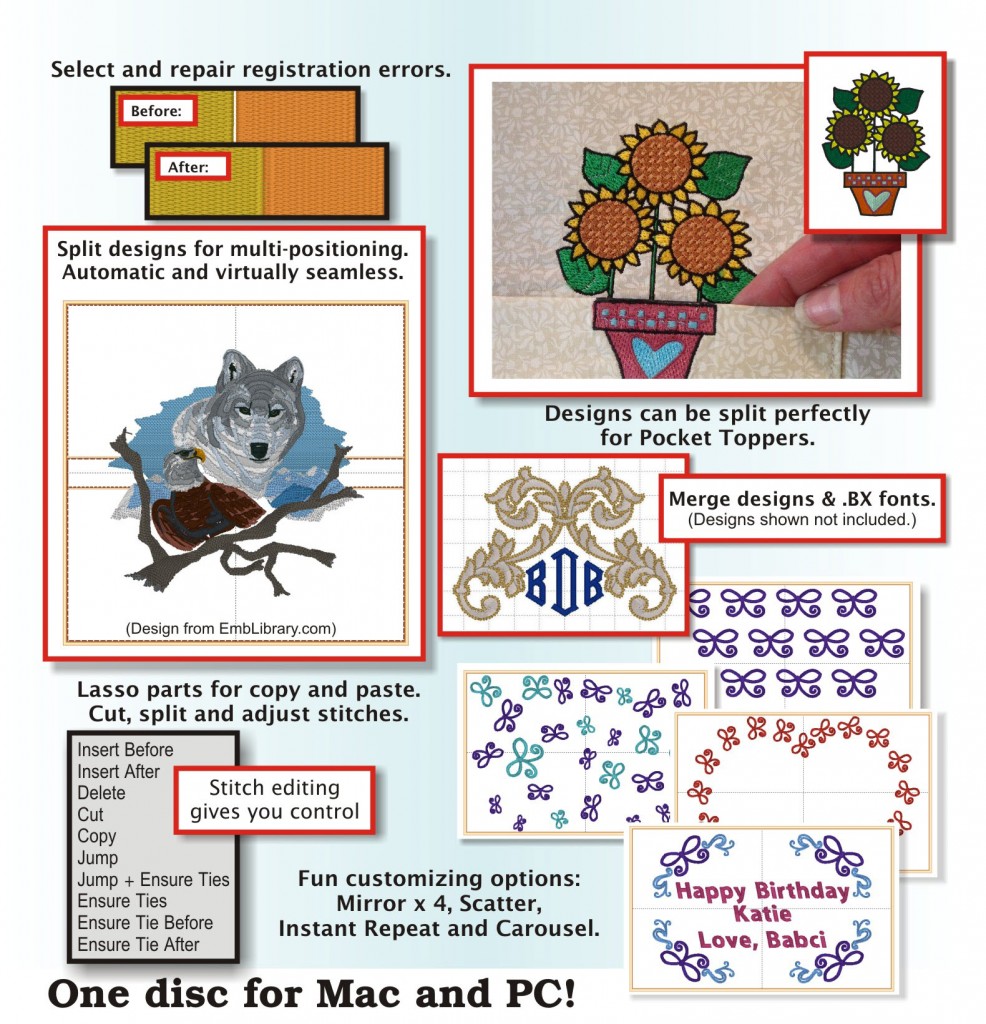
Check out these features:
-
Stitch editing
-
Multiple hooping
-
Baste Hoop
-
Precise Position
-
Mirror X 4
-
Instant repeat
-
Carousel
-
Scatter
-
Advanced Thread editor
-
Advanced Sizing controls
-
Advanced Stitch properties
-
Runs without Essentials, but when combined, a lot of easy-to-use fun can be
found!
STITCH
EDITING
You can select stitches in your design using Lasso and similar tools; move,
delete, copy paste, split, and more. Repair gaps in stitching. Adjust
compensation, change stitch type from satins and fills, select and correct
stitch types, including cleaning up jumps, ensure tie stitches before and after
jumps.
The ability to edit individual stitches is a very useful tool. Sometimes there
are parts of a design that you simply do not want. Other times, there are jams
of stitches that simply cannot be removed any other way. In still other cases,
you want to add a few stitches to get rid of gaps or increase coverage in an
area that’s not necessarily a fill. Maybe you just want to make a pocket topper?
Multiple hooping
So, you saw it on the Internet and had to have it.
But it’s too big for your machine…
Embrilliance Enthusiast has our patented design splitting technology built into
it. This system automatically splits designs into multiple positions for sewing
as separate designs which tile together to make a larger design. In the past,
splitting a design took hours of editing by a person schooled in the process.
Our splitting drastically reduces the visible ‘seams’ that occur from manually
splitting files using an editor. In most cases, the final product is
indistinguishable from one created on a larger-field machine.
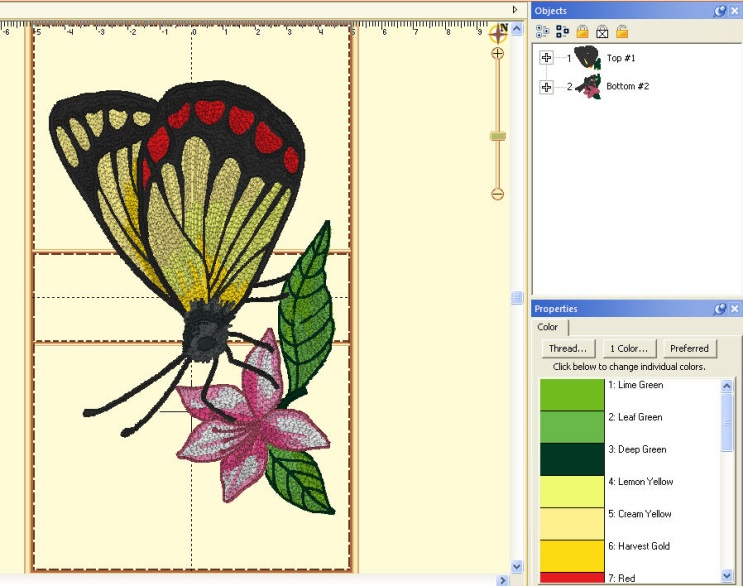
Some hoops have multiple positions. This means that you only hoop the fabric
once and generate the design by sewing it in those multiple sections. However,
you can achieve the same result by re-hooping the fabric multiple times to
create the design. We call this a “Virtual Hoop.” The Essentials version of the
program comes with many hoops and virtual hoops pre-defined. The Enthusiast
version has creation and editing of these hoops as well.
When sewing designs in multiple sections, often the question of alignment comes
up. This is accomplished automatically with multi-position hoops, but to make it
easier for regular hoops, the program will add basting stitches which will align
the designs. To choose a hoop, click the preferences button on the toolbar, and
the Hoops window will appear:
Many built-in multiple position hoops pre-loaded. Split AUTOMATICALLY using our
patented feature. Use Mega Hoop, Plus Hoop, Jumbo Hoop, Dream Hoop, Hoop-It-All,
etc. You can even use many regular hoops in a side-by-side arrangement so your
sewing field is now as wide as it is tall.
Baste Hoop
With Essentials, individually selected designs can have a basting stitch added
automatically. This is useful when you want to add a layer of stabilizer or some
other material before the sewing of a design.
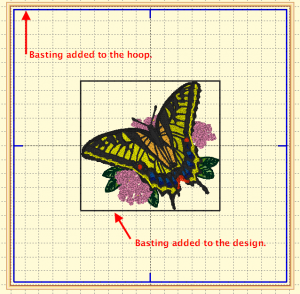
But with Enthusiast, a basting stitch can be added to the hoop, which allows for
a layer of topping stabilizer to be basted in place before any designs are sewn.
A typical use of this is to add a layer of water-soluble topping to a towel,
which will prevent the terry cloth loops from coming up through the embroidery.
It can be hard to hoop a towel, and the topping stabilizer will want to slide
around before the stitching happens, so basting it first can make the process
easier.
Precise Position
Accurate positioning of any design on the page. Use this advanced customizing
feature for perfect layouts.
 You
can precisely position designs using these buttons. The three buttons on the
(top, left) control the display of the x-axis position. There are Left, Center
and Right, which means that when you have the Left button set, the display will
be of the left edge of the design.
Similarly, the bottom three buttons control the vertical axis, top, center and
bottom respectively. The position controls are very useful for creating tiled
patterns.
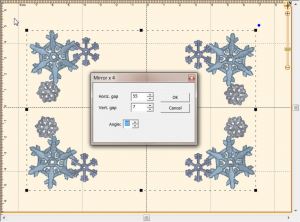
Mirror X 4
Take corner designs and perfectly set them in all four corners of the hoop.
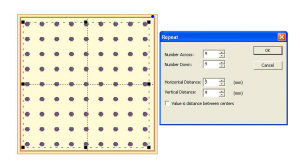
Instant Repeat
Repeat a design across and down. Make a nice effect.
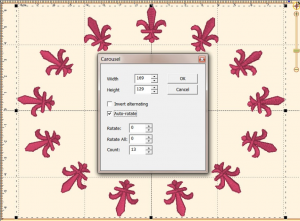
 Carousel
Create a circular composition out of your designs.
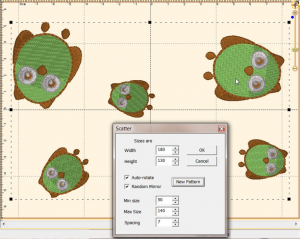
Scatter
Unique effect to create copies of your designs, including lettering, for neat
effects on large spaces.
Advanced Thread editor
Beyond the Essentials palette creator, the Enthusiast editor lets you make your
own thread brands, and pick colors right off web pages or PDFs.
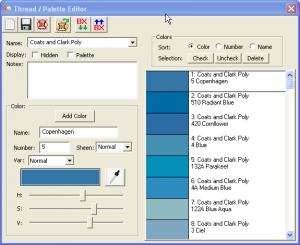
The color grabber tool will let you click in any window and pick up whatever
color is under the cursor. This is very useful when you are building a thread
palette from a document such as a .pdf or a thread manufacturer’s webpage. If
you want to adjust the color visually, use the HSV (Hue, Saturation, Value)
sliders until you get a color that you like.
Advanced Sizing controls
The sizing in Essentials is automatic and very clever, but it uses a set of
default parameters. The Enthusiast in you might want to adjust those parameters.
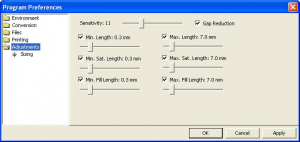
-
The sensitivity control is used to control how well the program discovers
fills and satin stitches. If you have a design which has a lot of manually
created stitch effects, then you may want the sensitivity higher, whereas
normal designs that are digitized with objects like fills probably don’t
need so much sensitivity, especially if there is blending going on.
-
Gap Reduction is a function within the software that helps adjacent areas
lessen gaps that might be exposed or widen during increases in size.
-
The stitch length filters are used to prevent loopy stitches on the fabric
from stitch elongation, and in the other direction, small stitches from
gathering on the fabric making too many perforations or simply bunching up
the fabric.
-
The settings are broken out by stitch type because the handling of satin
stitches is special and you may want to achieve a split-satin look at a
certain size.
Advanced Stitch properties
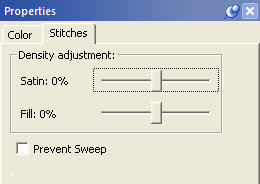
Control satin and fill density within each color layer in any stitch file. The
stitch properties tab appears when a stitch design is selected. There are
controls where you can add or remove up to 25% of the stitches by increasing or
decreasing the density of the selected items. The slider controls will
separately allow the adjustment of satin stitching and fill stitching, which
allows very specific control.
If you are a DRK user, there are additional controls which also tie in to the
Project Advisor and the Project system.


 Embrilliance Download Page
 How Can I Split a Large Design using Enthusiast?
 How can I make monogram letters intertwine with each other?





cathy f.
Hi 2 quick questions -
a) I would like to be able to "tweak" a downloaded / purchased design, specifically remove components or unlink stitches. Can I do it with this software?
b) how often are updates to the software done?