What's New Wednesday
Watch: 
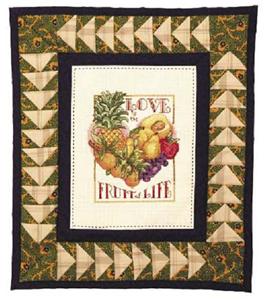
Fruit of Life Quick Quilt
This quick quilt project can be finished either as a wallhanging or as a pillow. Its finished size is 12 1/2" x 14 1/2". All seams in this project are 1/4 inch.
1:
You will need an 11 1/2" x 16" piece linen/cotton blend fabric, embroidery design "Love is the Fruit of Life 14 ct" (Love-14), a blue-violet tonal print fabric for the first border, a 15” x 18” piece of blue violet tonal print for backing/binding, a tan plaid fabric for the Flying Geese border, a green/orange vine print fabric for Flying Geese border & corner stones, cotton batting, and a template sheet (see the resources section).

2:
Prepare for embroidery. The "Love is the Fruit of Life 14 ct" (Love-14) design will require a 5" x 7" or larger embroidery hoop. We suggest either an iron-on or sticky stabilizer when hooping any fabric for use with cross stitch. Stabilize the linen/cotton fabric with the stabilizer you've chosen and then hoop the fabric.
3:
Print out and refer to the Fruit of Life PDF file, included with the design file, for correct colors as you complete the embroidery.
4:
Now to cut and assemble the quilt pieces. After completing your stitching, trim fabric around "Love is the Fruit of Life 14 ct" (Love-14) to 7" x 9", so that the embroidery is centered in the rectangle.

5:
Trim the blue violet fabric strip to measure 1 1/4" wide, and cut two 9" strips and two 8 1/2" strips. Sew the 9" strips to each side of embroidery, and then add the 8 1/2" strips to the top and bottom, completing your first border. Press seams towards border.
6:
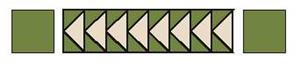
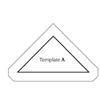
Next, work on the Flying Geese border. Cut two strips 1 1/2" wide from the tan plaid strip, then cut to make 34 2 1/2" x 1 1/2" rectangles. These will be the tan triangular "geese" in the border. You will need the additional piece of tan plaid to make the last two geese. Trim this piece to 3" square and slice once, making a total of 36 geese. You may also use the template PDF provided should you choose to cut and piece your geese traditionally. If you choose this method, first print out the pattern pieces from the PDF template. Then make templates using a medium weight cardboard or template plastic.

7:
Cut three strips 1 1/2” wide from the 5” strip of green/orange vine fabric. Cut strips into 72 1 1/2” squares. These will become the two small triangles in each unit. You may also use the printable template file provided for traditional cutting and piecing.

8:
To construct the Flying Geese border, you will need a total of 36 geese. Place a vine fabric square on one end of the tan plaid rectangle and sew corner to corner across the square (Diagram A).

9:
Fold the square in half towards the corner and press. It may help you to fold the vine fabric square in half diagonally and finger press to get a visual sewing line. (Diagram B).

10:
Place a second vine fabric square at the opposite end of the rectangle and sew diagonally from the center of rectangle where first square was sewn. (Diagram C). Trim the excess fabric away at the seam line to remove extra bulk. Fold the square towards the corner and press.
11:
Continue on in this manner until all 36 geese are completed, then make two strips of ten and two strips of eight geese, being careful to keep your points sharp at each seam; press.
12:
Trim the remaining green/orange vine fabric to 2 1/2” x 10”; then cut into four 2 1/2” squares.

13:
Attach two squares to each end of the ten geese strips.

14:
Refer to photo for geese orientation, and join to "Love is the Fruit of Life 14 ct" (Love-14) embroidery, again taking care to keep your triangle points sharp; press.

15:
Layer Fruit of Life picture, batting, and a large piece of blue violet print; baste or pin. We hand-quilted 1/4" from seam line of the first border, all around Fruit of life with purple quilting thread, and diagonally through each corner stone.
16:
After quilting your design as desired, trim all excess batting, then trim excess backing to 1” all around the quilted picture.
17:
To construct self-binding, fold 1/2" of backing towards picture. Fold again and pin and sew to quilt.
18:
At this point, you may also make the quick quilt into a pillow by adding polyester stuffing before you finish closing the sides.


 Clover Mini Iron
 Kitchen Quilt Wallhanging
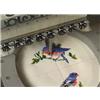 Cross-stitching With an Embroidery Machine