Software Success: More about the new Edge to Edge Plugin
Watch: 
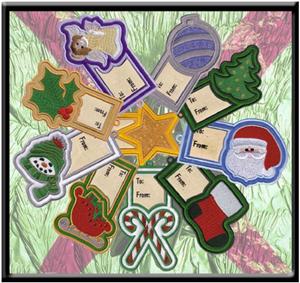
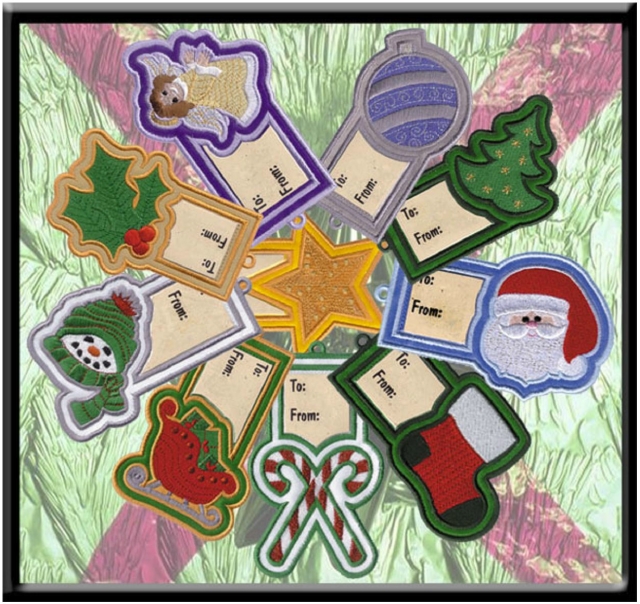
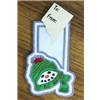
Christmas Gift Tags
Add a little homemade decoration to your Christmas gifts by embroidering applique gift tags. Reusable "in the hoop" gift tags can be enjoyed year after year. Here are the instructions for creating Starbird's lovely gift tags.
Step 1:
Materials: One Christmas gift tag design from Starbird's "Christmas Gift Tags" design pack, three pieces of tear away backing, one front applique fabric piece, one back applique piece (a mirrored version of the shape for the front), one clear plastic pocket applique piece, bobbin thread to match the outer border of the tag, spray adhesive (we recommend a low-tack adhesive for the pocket), and card stock paper for the tag insert.
Step 2:
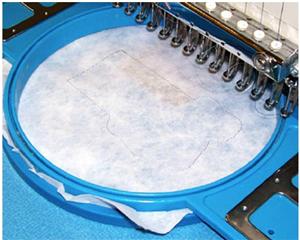
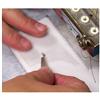
First cut your applique pieces. Hoop a piece of backing and embroider the first color stop. Use this as a template for the front and back pieces of fabric applique. You will need one front side and one back side applique piece. (The back side piece will be a mirrored image of the front side.) You will also need one clear plastic pocket applique piece. Hoop another piece of backing and embroider the fourth color stop for a template and cut your clear plastic applique piece according to that stitched line.
Step 3:
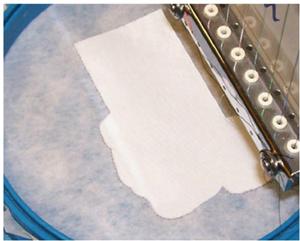
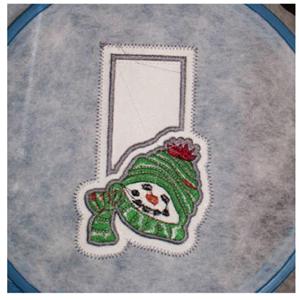
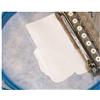
Now you are ready to embroider the gift tag. Hoop a piece of tear away backing and begin embroidering the design. After the first color stop (the "dieline") has embroidered, stop the machine and add the top applique piece. We used white PSA twill applique.
Step 4:
Start the machine again and it will tack down the applique piece and embroider the dieline for the clear plastic applique piece. Once that is done, stop the machine again, spray the back of the clear plastic sparingly with a low-tack spray adhesive, and then place within the dieline. We used a shower curtain for the clear plastic.
Step 5:
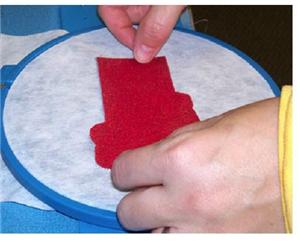
Start the machine and continue embroidering until you come to the next stop for the back applique piece. Remove the hoop from your machine. (Do not un-hoop the design!). Turn the hoop over so you are looking at the backside of the design.
Step 6:
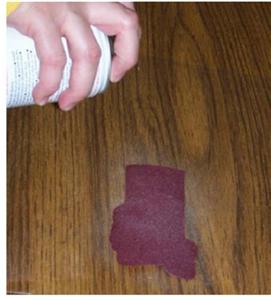
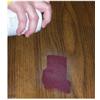
Now take your back applique piece and generously spray adhesive to the bottom of the fabric.
Step 7:
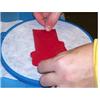
Now place the bottom applique piece on the back of the design making sure that the applique piece is secured and will not fall off when you return the hoop to the machine. We used a red metallic fabric.

Step 8:
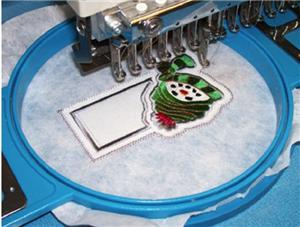
Carefully return the hoop to your machine and continue embroidering the design.
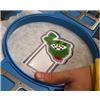
Step 9:
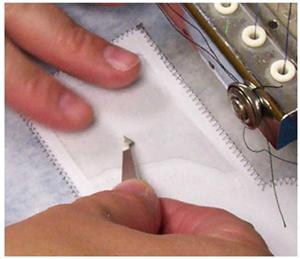
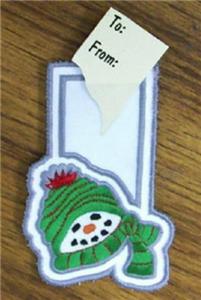
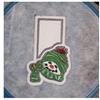
Once the embroidery is completed, remove the hoop and then remove your completed gift tag. Gently cut out the tearaway backing inside the loop at the top of the gift tag. Then clean up any rough edges around the outside of the tag.
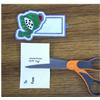
Step 10:
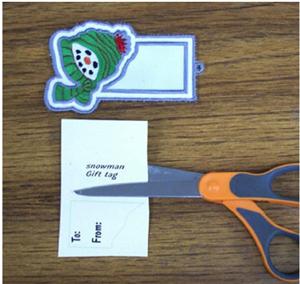
You are almost done. Print your gift label inserts on card stock paper, found in the "Label Template PDF" file linked in this project. Cut the insert that is for the gift tag you have selected along the printed edges.
Step 11:
On your insert fill in the "To:" and "From:" areas with names. Now slide your insert into the gift tag pocket and tag your gifts. (You may have to gently slide your scissors between the plastic piece and the tag to separate it from the tag.