Inside the Hoop with Kimberbell
Watch: 
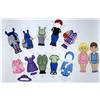
E-Doll Instructions
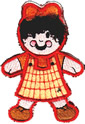
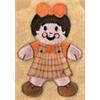
Beverley from Artistic Embroidery Digitizing says: "The idea of doing e-Dolls came when I had to prepare an earthquake comfort pack for our 4 year old daughter. Her school asked for a toy, among other things, that could fit in a ziplock bag. In the event we got separated during an earthquake, she would have them to play with. I went to work to create two e-Dolls in the image of her mum and dad! I had to run an extra set to put in her emergency kit since she adopted the first dolls taking them everywhere in her pocket.
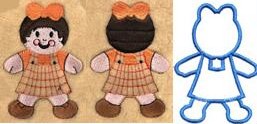
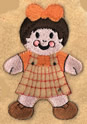
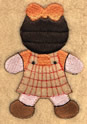
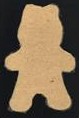
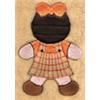
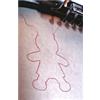
E-Dolls are made up of three programs and require assembly. Design A represents the front of the e-Doll (this design can also be run by itself on any garment with design C to finish the edge). Design B represents the back of the e-Doll.
1:
Choose the fabric you want considering that the thicker the fabric, the more difficult it is to get the border program (C) to secure the front (A) and back (B) together. The fabric in most e-Dolls will be open (not stitched) in some areas of the design (i.e. part of the clothing), and a light polar fleece will make the doll soft and cuddly. Determine the thread colors to match the chosen fabric and the color of the border. For example you can choose a color for the hair to match yours! It is best to use matching bobbin thread and top thread for the final border (design C).
2:
Hoop the desired fabric with a standard backing material.
3:
Sew out the front side of the embroidery design (Design A).
4:
On the same material, re-hoop a new piece for the back side of the embroidery design (design B). This is not necessary if your hoop is large enough to accomodate both designs A and B in the same hoop.
5:
Sew out the back side of the embroidery (design B), matching the colors to the front embroidery. (i.e. same color for hair)
6:
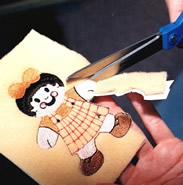
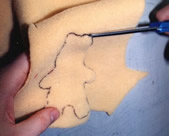
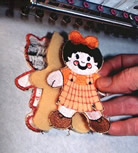
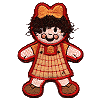
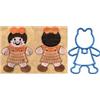
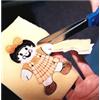
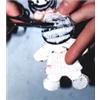
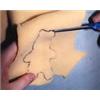
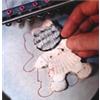
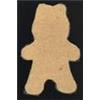
Cut around the shape of the e-Doll front and back embroideries (A and B) as close as possible to the outside edge.
7:
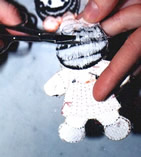
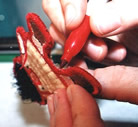
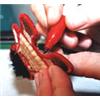
(Optional) For the designs identified as having "fuzzy hair or pompom", to obtain the "loose hair" effect, clip the bobbin thread on the back of the embroideries where the hair is. Be careful not to pull through the thread on the front side. You may get better results by clipping the bobbin thread while the doll is still in the hoop. ONLY CLIP THE SECTION (I.E.HAIR) WHICH HAS BEEN SPECIALLY DESIGNED TO BE CLIPPED. You also have the option of not cutting the bobbin thread at this point and using scissors after the e-Doll is assembled to trim the hair.
8:
(Optional) If you want a thicker doll, cut a shape of the doll out of filler material (D). A thick polar fleece seems to work best. Be warned that some embroidery machine may have trouble sewing through three thick layers of materials. (Filler materials are NOT necessary to obtain good results.)
9:
Hoop a heavy tear-away backing alone (no fabric).
10:
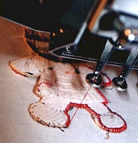
Run the border-secure e-Doll design (C). It is better to run the first part of this program at slow speed. After a first running stitch outline is done, the machine will stop. You can also attach the front and back together by sewing them by hand instead of using design C on the embroidery machine. This will allow you to put more or different stuffing material in the e-Doll and give it a different look.
11:
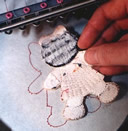
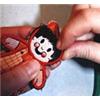
Place the back embroidery (B) face-down on the backing material over the outline. A spray adhesive may help minimize movement of the e-Doll section being secured.

12:
Start the machine again. The machine will do a zigzag stitch tacking down the back part of the doll (B) to the backing material and then will stop again.
13:
(Optional) If you want a thicker doll, place the pre-cut filler material (D) over the back embroidery (B).
14:
Place the front embroidery (A) face-up over the outline, optional filler (D) and back embroidery (B).
* Note: You can also make this into a Christmas ornament by inserting a string or ribbon at the top in-between the two layers.
15:
Start the machine again. The machine will first do a light zigzag stitch around the outline to tack down the front doll (A). If you notice that the pieces are not lining up properly, stop the machine, back up, reposition the pieces, and restart. After it has sewn once around the doll securing all the elements together, you can speed up the machine to regular speed. It will then do the last two zigzags to complete the securing of the doll and create the final outer border.

16:
When the machine finishes, un-hoop and remove the tear-away backing.
17:
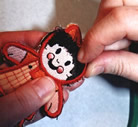
Clean-up the border with small scissors to remove excess material. You can also use an old trick of the trade by using a felt pen or crayon the same color as the border to color the material not covered by the thread and the fuzzy edge of the backing material showing along the edge.
18:
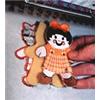
For the "fuzzy hair or pompom" designs, scratch the e-Doll hair or pompom with your fingernails. The long threads will pull through and give it the "loose hair" effect. (This is a fun thing to let your child do. Kids will feel they make the hair grow like magic!) You can also clip the hair using scissors to give it the desired haircut look.
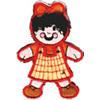
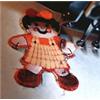
19:
Your e-Doll is now ready to play with!


 "Paper" Dolls